We’ve been all about Fall/Autumn and Thanksgiving activities and crafts this month! Last week Emily worked on her letter recognition by doing our adorable Turkey Feather Name Activity. Now that she’s done chasing our cat with it, Mr. Turkey is hanging safely on the refrigerator. I’ll have a new post up soon with the scoop on the other fun things we’ve been doing, but over the weekend we did this colorful Fall Paper Plate Wreath Craft. It’s a perfect fall/autumn or Thanksgiving kid craft for any age! And you won’t beLEAF how easy it is to make. Yeah… you see what I did there.
I’m sure you love the colors of fall as much as I do and the different shades and variations of leaves on every tree. Mostly we see a lot of brown, red, orange, yellow and green. But you can also find pinks and deep shades of purple. The thing I like so much about this wreath craft is the fact that you can make the leaves any color you want. And if you don’t happen to have any colored paper on hand, no problem. Cut some leaves out of white paper and give your kid some crayons!
This is such an easy craft because it can be made with stuff you already have in the house.
🎉 Get $20 Off Outschool Classes!


Here’s what you’ll need to make the fall paper plate wreath:
- 1 10-inch paper plate
- Scissors
- Construction paper (in brown, red, orange, yellow and green)
- Leaf Template – print and cut out
- A glue stick or bottle of school glue
- Ribbon – between 1-2 inches wide (any color or pattern you choose)
- Curling Ribbon (any color)
- A marker or glitter glue pen
Here’s how to make it:
1. Cut the center out of the paper plate and set aside (it will be used later). Scissors work fine for this, just pierce a hole in the middle of the plate and cut outwards then around the inside diameter of the plate. If you have a utility knife, that works better.
2. Trace the leaf template onto various colors of construction paper and cut them out. A trick to avoid excessive tracing and cutting is to fold the construction paper in quarters, then trace the leaf pattern onto one of the quarters and cut it out. You will end up with 4 leaves (and they may not match each other perfectly, which is what makes them perfect for the craft).
- You’ll need a minimum of about 10 leaves to cover the paper plate which is a good for little kids with short attention spans. layering more leaves will give the wreath a fuller look however. I think we used 18 leaves on our wreath.
3. Turn the paper plate ring upside down (so the bottom of the plate is facing up) then round up a colorful pile of leaves, and let your child glue the leaves onto the ring.
- If your kid loves glue as much as mine does, give them a lot of leaves to glue on. It will keep them busy for a bit (and the wreath will be full and colorful).
4. While the leaves are drying, take the paper plate center and cut out an oval or rectangular shape. This will be the sign for your wreath, so make it any size you want as long as its small enough to fit on the wreath but big enough to read the message.
5. Using the marker or glitter glue pen, write a message on the sign (be sure to let the glitter glue dry). Some message ideas:
- Give Thanks
- Be Thankful
- Happy Fall
- Happy Thanksgiving
- Your child’s name
- Your family’s name (The X Family)
6. Cut a strip of ribbon about 12 inches long and tie it into a bow. Here’s a YouTube tutorial on how to tie a pretty bow if you need one.
7. Once the leaves on the wreath are dry, let your child glue on the bow and sign. If the glue doesn’t work well with the material of your bow, use hot glue to attach it instead.
8. Cut a strip of curling ribbon about 6 inches long. fold it in half and glue it to the top back of the wreath (this will be the hanger).
And now your wreath is ready to display!
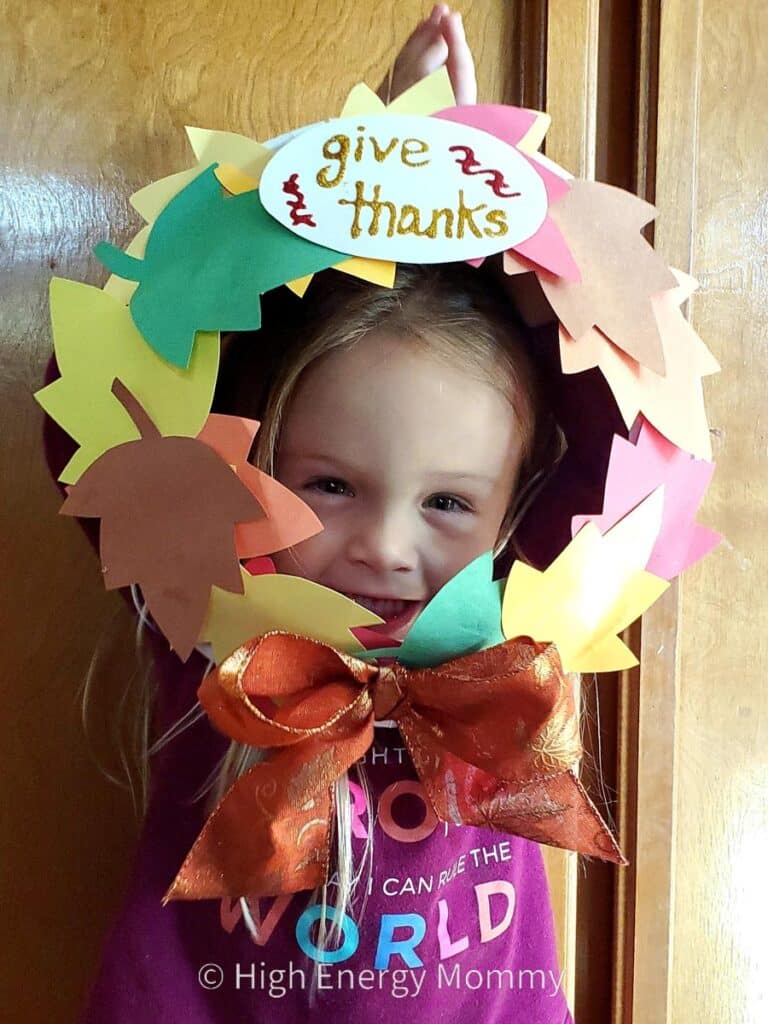
Don’t be surprised if your kiddo wants to wear it first. Emily wore hers like a lion’s mane and walked around roaring for a few minutes before we hung it up.
The Fall Paper Plate Wreath Craft will be a great addition to your fall decor this year!
Happy Fall!
Want more fun fall stuff?? Check out these 10 Unique Turkey Crafts!