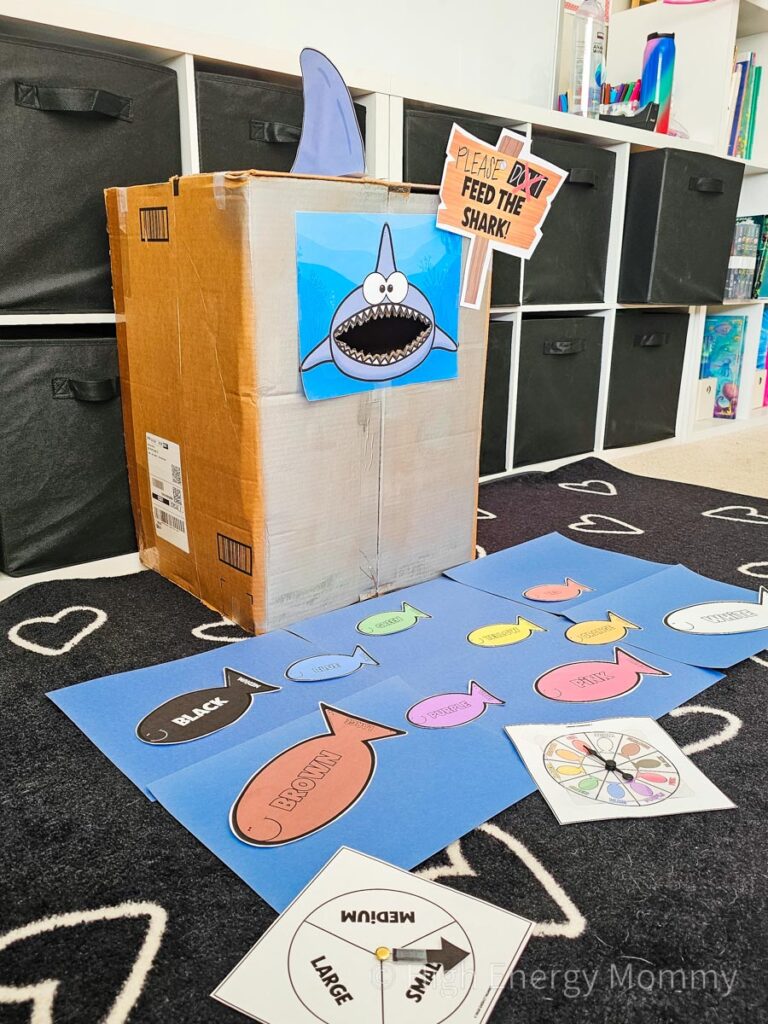
When you decide to have an ocean theme in your preschool, this Feed the Shark game is an absolute must! It’s by far my most favorite activity; partly because it’s adorable, but mostly because it makes kids happy and it’s so much fun for them. It’s a great way to get energy out through a ton of movement while they work on fine motor skills and practice early math like number and color recognition, size sorting, subitizing, and counting. It’s also an engaging way for kids to learn the alphabet and letter sounds too. It’s perfect for play-based learning and will keep their attention for hours!
This post may contain Amazon, or other, affiliate links for products that I personally use and recommend for kids and homeschool learning. This means I will earn a small commission if you purchase through my link, and if you do, we thank you so much! For more information, please read the full Disclaimer and Disclosure.
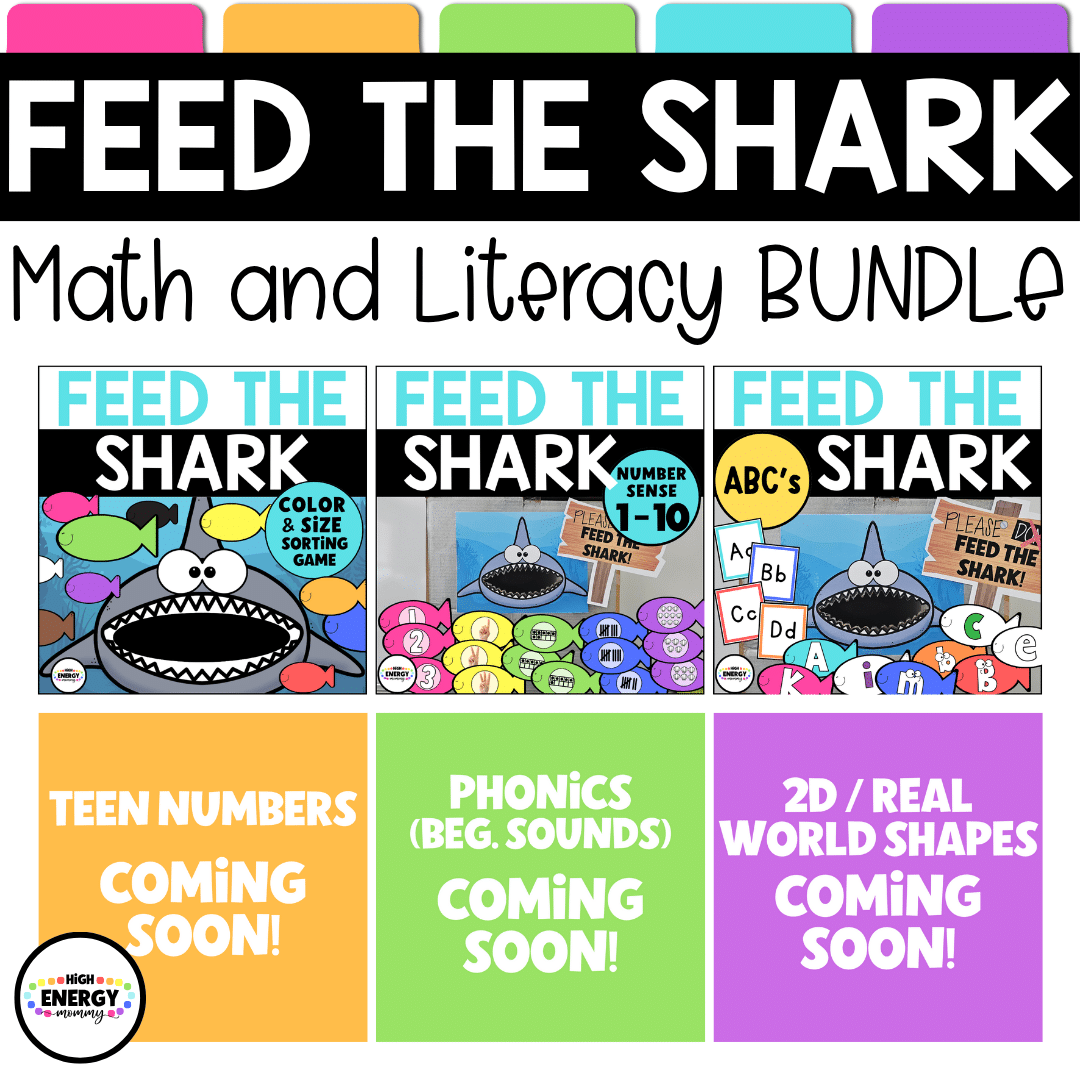
This game started out as an idea I saw on Pinterest when my daughter was in preschool and I decided to make my own version at home. After sharing my initial shark activity here on the blog, it gained a lot of attention from parents and teachers wanting to make it too. However, many of them were short on time or patience…and I get that! It made me really want to help them out. Fast forward a bit and I am so happy to say that I have THREE of my own versions of the Feed the Shark game now fully available as a printable on Teachers Pay Teachers (TpT)!!
🎉 Get $20 Off Outschool Classes!

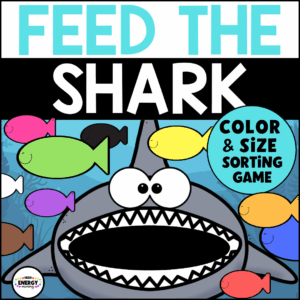
Feed the Shark Game: Color and Size Sorting.
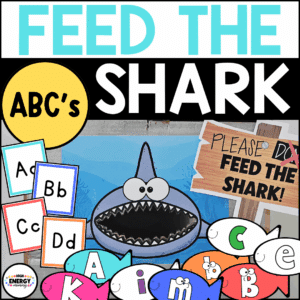
Feed the Shark Game: Alphabet / Letter Recognition
Or… save with the Feed the Shark Growing Bundle!
While you can totally play this game using a tub or container, it’s way more fun if you can use a medium or large cardboard box. Using a box makes a BIG shark. And that’s really exciting! Plus, not many kids can resist anything that has to do with a cardboard box (especially if it has a shark fin on top). If you are super short on time or need to set up multiple sharks, this type of dish washing tub from Amazon works well.
The game is easy to set up and comes with (most) everything you’ll need – minus the box or container for attaching the shark face, and a couple other craft supplies you likely have on hand already.
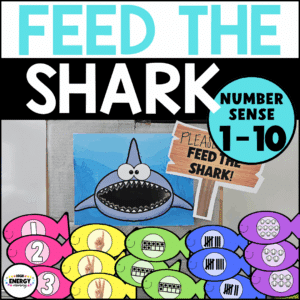
To get started, head over to my TpT store for the Feed the Shark Color and Size Sorting game printable or one of the other Feed the Shark games!! Here’s an idea of what’s included in each of the printable packets:
- Adorable shark face with a wide, toothy mouth (and an underwater background)
- A “Please DO Feed the Shark” sign to hang up near your shark
- Shark fin to put on top of the box
- Fish in multiple colors and black and white
- Multiple style options for the focus activity (i.e. number sense comes with different number forms, alphabet has capital and lowercase)
- Game spinners and/or game cards
- Extras: like fish templates, rainbow fish, spinner options
- BONUS: if you purchase the Feed the Shark Bundle, you’ll get 2 additional ocean friends to feed!
Oh P.S. – It makes a fin-tastic addition to these other ocean theme preschool activities and games too!
OK, let’s dive-in and talk about how to set it up!
Feed The Shark Supplies:
- Feed the Shark Game
- Cardboard box- large enough to fit an 8.5 x 11 in. piece of paper. If possible, a medium or large rectangle box that can stand tall, works best. *If you do not have access to a box, use a tub or container with an opening that you can attach the paper to
- Scissors and exacto knife or box cutter
- Tape or Glue
- Brass paper fasteners (brads) (for game spinners)
- Small paperclip (for game spinners)
- Optional: white cardstock (for printing fish – makes them more durable)
- Optional: colored paper (for printing fish if you prefer not to print in color). I love the bright colors and quality of Astrobrights cardstock and paper
- Optional: craft (popsicle) stick (to keep shark fin upright)
Directions:
Make the Shark
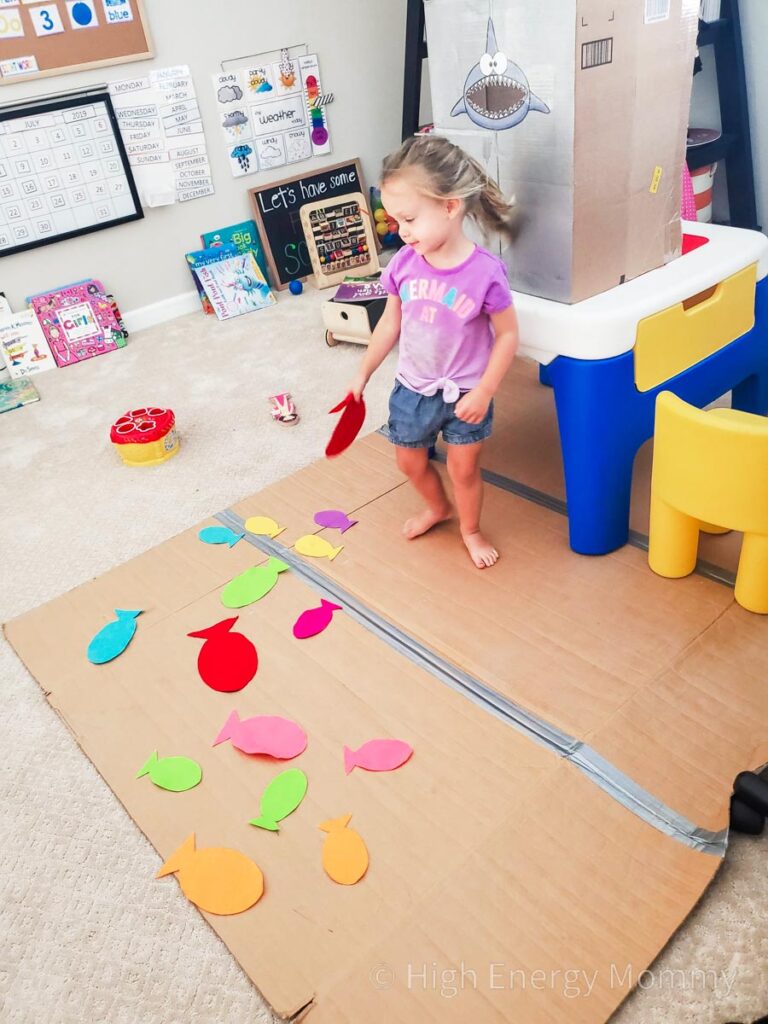
- Grab your large/medium-sized cardboard box (the one I used was approx. 21 inches long x 15 inches wide x 6 inches deep). Seal one side of it but leave the other side open.
- Tape the flaps of the open end of the box together, so they’ll stay open (this gives support to the box when the kids are putting the fish through the shark’s mouth so the box doesn’t keep falling over backwards). It also makes it easy to retrieve the fish.
- Optional: Paint the box (and let it dry). This is not necessary but I chose to paint our box because I thought it would be more fun to play with it if was “shark” color 😊. I only painted the front side of the box that the shark face would go on and I used a metallic silver spray paint. But you could also paint it a dark blue to match with the page background and make it feel like the shark is in the “depths of the ocean”.
- Print the page with the shark face and carefully cut out the center of the shark’s mouth. You can also cut around each tooth for a “toothy” look. I used an exacto knife for precision cutting around the teeth.
- Next, lay the shark face page on the box where you’ll want to attach it, and carefully trace around the inside of the mouth. Then, using a box cutter or exacto knife, cut out the traced shape from the box to make a hole.
- Tape (or glue) the page with the shark face to the box, so the mouth is over the hole you just cut. I used long strips of clear packing tape that I layered in rows across the entire face until it was covered completely, and then I re-cut around the teeth. I only did this so the face couldn’t be picked off by little hands because my kid loves to pick!
Make the (optional) Shark Fin
- Print both pages of shark fins and cut out the fins, including along the dotted lines at base of fin, but do not cut along the “fold here” line.
- On the “fold here” line, fold up toward the colored side of the fin.
- On the back (not colored) side of one fin, tape or glue down a craft (popsicle) stick, lengthwise. This will help the shark fin stand up when it’s attached to the top of the box. *If you don’t have a craft stick, a short pen will work, or you can use a small piece of crumpled paper too.
- Next, glue the non-colored sides of the fins together, leaving the folded base parts unglued.
- Fold the base parts down and tape or glue them to the top of the box, above the shark’s head


Prep The Fish to Feed the Shark
- Print the fish pages you want to use – I recommend printing the fish on cardstock paper. If you want to save printer ink, print the black and white fish onto colored cardstock. I like to use Astrobrights cardstock and colored paper.
- Print as many fish as you want, the more fish the more fun!
- Cut out the fish.
- Optional: If you have the time, make fish cut outs from lightweight felt. They are durable and will last forever. I had pre-made a bunch of felt fish for a preschool fishing game and they ended up being perfect for feeding the shark. I purchased this bright pack of felt from Amazon and used my fish templates to make the fish in 3 sizes. The fish templates are an included bonus in the Feed the Shark printable.


Make the Game Spinners
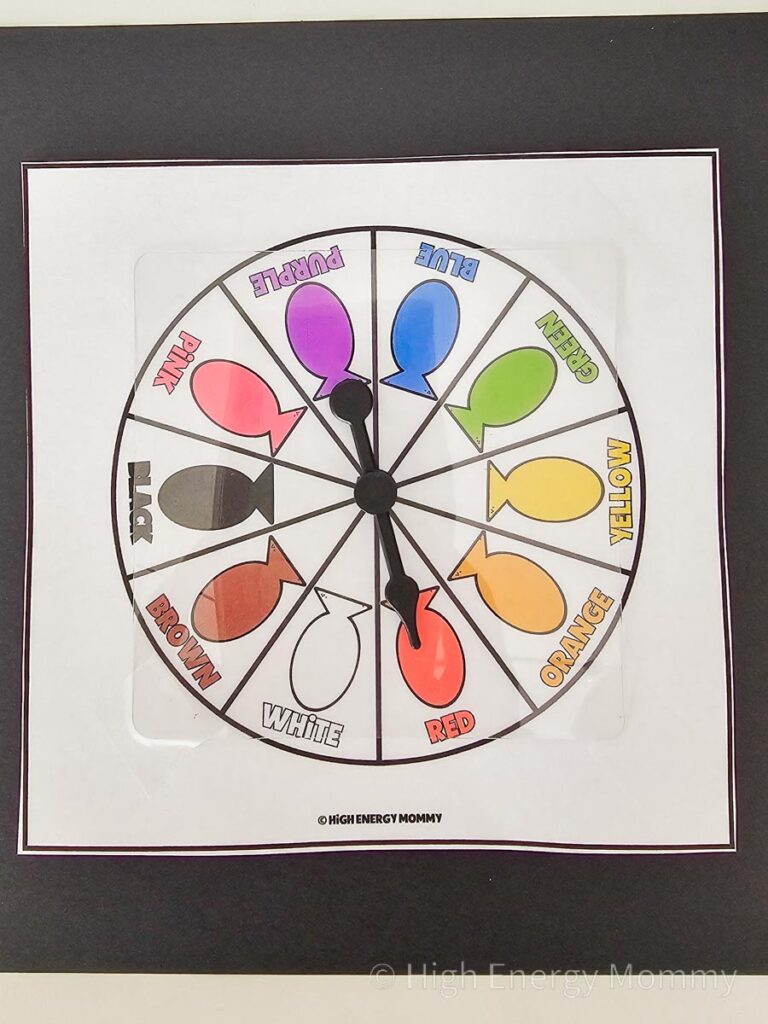
NOTE: the quickest way to set up a spinner is to use a pre-assembled one. I use these transparent game spinners from Amazon. Simply tape one to the top of the spinner base you want to use and you’re ready to go (as shown in the photo below with the color spinner).
However, here’s an easy way to make a spinner:
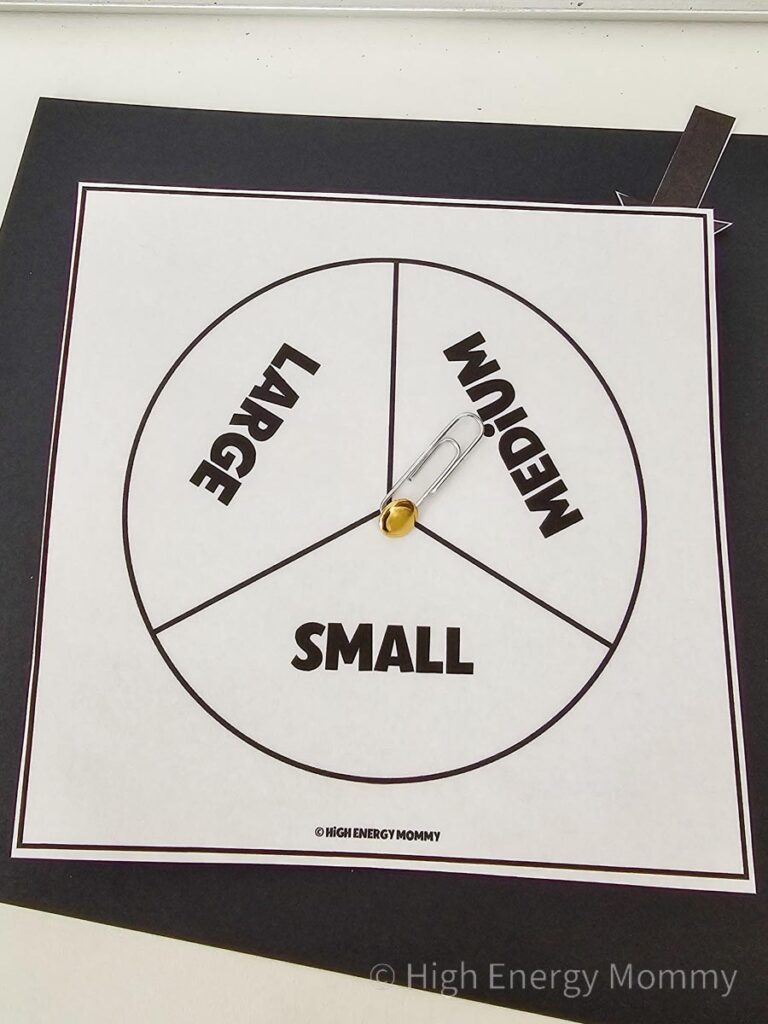
- Print and cut out the base of the game spinner(s) and arrow(s) – I recommend using cardstock paper for the spinners and arrows to make them more durable
- Poke a small hole in the center of the spinner base using a utility knife or a sharp pencil.
- Grab the brass paper fastener (brad) and paperclip. Insert one end of the brad through one end of the paperclip and into the hole in the spinner base.
- Spread the prongs of the brad on the back of the spinner to secure it in place, ensuring the paperclip can spin freely. Note: flatten but don’t tighten the prongs too much or the paperclip won’t be able to spin. You can secure the prongs on the back of the spinner with some tape.
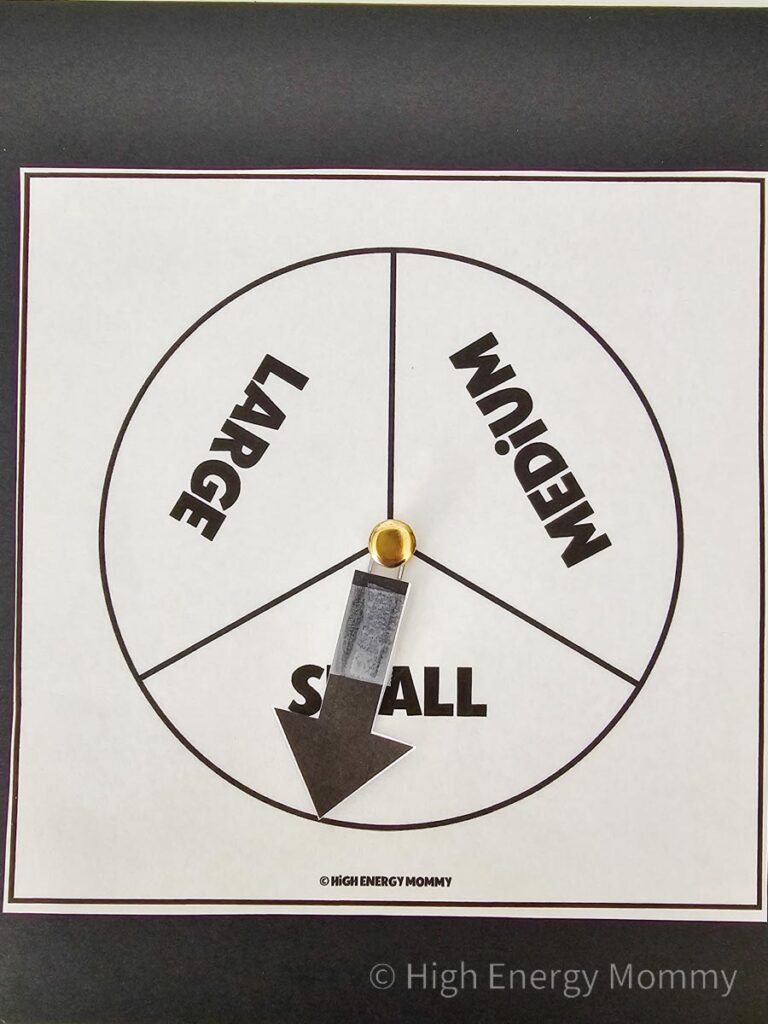
- Carefully tape the arrow to the top of the paperclip.
- Practice spinning the paperclip arrow and adjust as needed.
- Included in the printable packet is an option to CREATE YOUR OWN SPINNER- use this spinner for custom colors, size/color combinations, or any other way you choose! For repeated use, laminate the spinner base first, then use a dry erase pen to change it over and over.
Time to Feed the Shark!
- Set the shark up somewhere your little one can reach its mouth. I put our shark box up on a small table so it would be taller than my daughter and she would have to reach up a little to get the fish in the shark mouth. If you have smaller kids, you can leave it standing up on the floor, or even lay it on the ground with the mouth side UP, and let them put the fish in that way.
- Put the “Please DO
N’TFeed The Shark!” sign somewhere close to your shark. - Lay the fish out on the ground, or a table, so the colored sides are facing UP
- Finally, spin the spinner and let your find that fish and feed it to the shark! The more fish you have the longer the game will go.
- Here’s some ways to mix things up:
- Spin for colors or sizes and feed just one fish from the color/size, or feed all fish of that same color/size.
- Spin for size but have your child find the opposite size (small = large, large = small, medium = medium or just spin again).
- Spin both color and size spinners at the same time and feed that color/size fish
- Use the custom spinner to feed a specific number of fish to the shark (or to include feeding the BONUS rainbow fish!).

Use this game any time you need to “get the wiggles out”. Simply toss the fish on the floor or scatter them around the room and set a timer. Have you kids feed the shark as many fish as they can before the time runs out! Make it harder by going in rainbow color order.
I guarantee as soon as your kids see the shark, they’ll get so excited they might bust out a little song…here it comes…Ba-by Shark… doo, do, do, do, doo do. They will also likely want to give the shark a name. And they will definitely be asking if they can feed the shark… ALL. THE. TIME. The first week we had our shark, my little girl literally wanted to bring it everywhere we went.
Emily (my daughter / little cutie in these photos) and I would love to see our Feed the Shark game in action at home or in your classroom! How did you set it up? What did you name iyour shark? Please tag us @highenergymommy on Instagram or Facebook!
More ideas here >> Ocean Theme Activities and Games for Preschool