When my daughter and I read the Ivy and Bean series by Annie Barrows, one of the characters was absolutely convinced she was a witch. Naturally, she kept a spell book filled with her magical notes and that little detail totally captured my daughter’s imagination.
Before I knew it, she was scribbling “spells” into a plain old notebook. Cute, but… I couldn’t resist taking it up a notch. I thought, what if we turned her notebook into an actual spell book? The Hocus Pocus kind that looks like it’s been sitting in a dusty old library, full of secrets and mysterious ingredients.
And that’s exactly what we did!
🎉 Get $20 Off Outschool Classes!

This is not a quick craft (it takes a couple of drying days) but it’s one of those worth-it projects that kids will treasure long after the paint dries. Plus, it’s secretly amazing for building creative thinking, storytelling, and handwriting practice (especially if you’ve got a reluctant writer like mine who suddenly becomes Shakespeare when writing spells about “how to get mom to say ‘YES’ to anything” or potions for “sleep”).
So grab your glue gun and your imagination — we’re making magic today!
And if your kiddo ends up as obsessed with spells as mine, I’ve got you: there’s a free Potion Lab printable pack waiting for you at the bottom of this post when you sign up for my email list!
This post may contain Amazon, or other, affiliate links for products that I personally use and recommend for kids and homeschool learning. This means I will earn a small commission if you purchase through my link, and if you do, we thank you so much! For more information, please read the full Disclaimer and Disclosure.
Why Kids Love Spells (and Why You’ll Love Spell Books Too)
Before we get into the craft, let’s talk about the why. Why are kids so drawn to spells, potions, and magical writing?
- Kids love secrets and mystery. Spells feel like little secrets they get to write down, protect, and keep hidden from the “ordinary world.”
- It gives them a sense of power. Even if it’s pretend, writing a spell makes kids feel like they’re in control of something special. That’s a big confidence booster!
- It taps into their imagination. What if you really could make your mom say “OK” to anything? Or summon a cookie with a snap of your fingers? The possibilities are endless.
- It feels playful, not like homework. Writing a spell doesn’t come with red pen corrections or pressure to be perfect. It’s silly, fun, and creative.
And for us parents? Spell books are actually sneaky learning tools in disguise:
- Creative Writing Practice: Kids get to invent their own words, spells, and rhymes.
- Handwriting Practice: Writing down spells gives reluctant writers a reason to put pencil to paper.
- Storytelling Skills: Each spell has a purpose — which is basically mini storytelling.
- Problem-Solving: Kids think about what they want to “fix” or “change” with their spells.
So yeah… spell books are way more than just a craft. They’re imagination fuel.
What You’ll Need for This DIY Spell Book
Here’s everything we used to make our spooky DIY spell book:
- A notebook (we originally used a dollar store cheap, thin one, but a sturdy composition notebook works way better)
- Cardboard (cut from a box) for extra-strong front and back covers
- Masking tape (to reinforce the spine)
- Foam letter stickers (to spell out “SPELLS” or your child’s custom title). We used glitter letter stickers because it’s all we had, but it also gave more texture to the book cover.
- Extra decorations: foam stars, plastic spiders, jewels, glitter, puff paint, etc.
- Hot glue gun & glue sticks
- A plastic ping pong ball eyeball (cut in half for 3D effect). Check your dollar store but Amazon also sells these glow in the dark ping pong eyeballs that would look super awesome on a spell book!
- Paper towels (preferably with a textured pattern)
- Mod Podge (or watered-down white glue)
- Acrylic paints (black, green, gold — or whatever colors your kids want)
- Paintbrushes and sponges
Step-by-Step DIY Spell Book Tutorial
Step 1: Reinforce Your Notebook
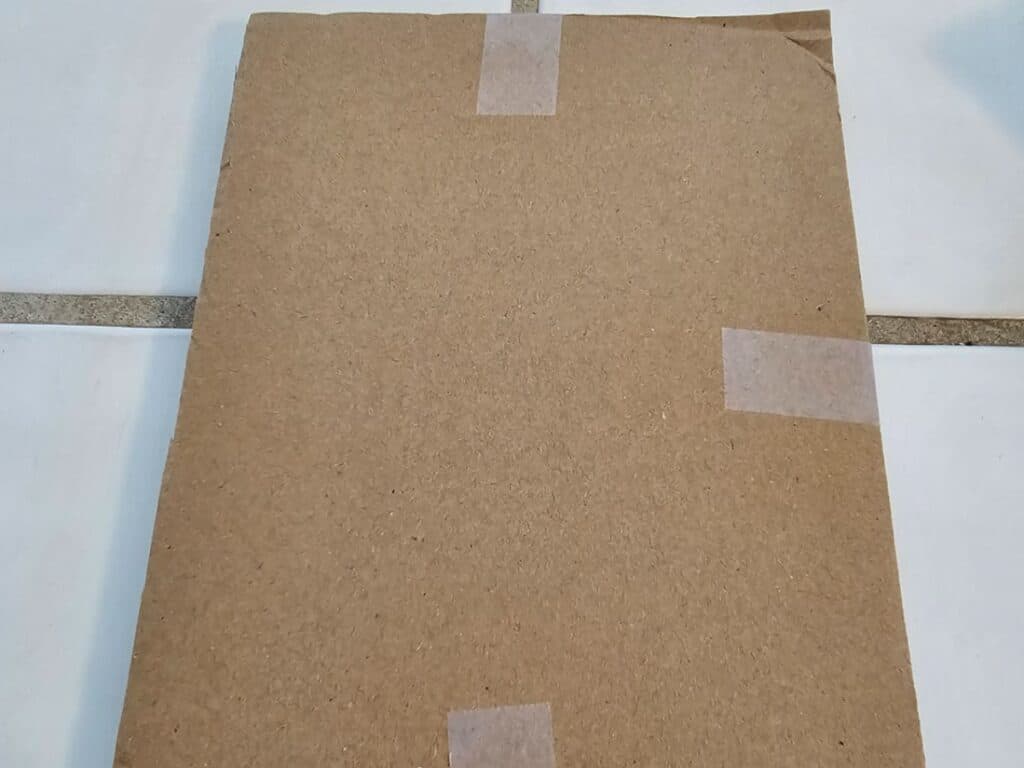
Start with your chosen notebook. It’s going to get lots of use so you’ll want to give it a sturdier, more “ancient spell book” feel by reinforcing the covers. Cut two pieces of cardboard from an old box — one for the front and one for the back — just slightly larger than your notebook covers. Glue them in place (I used both glue and tape to make sure they stayed put).
Now let’s strengthen the spine, because this is what really gives the book that chunky, old look.
Open the notebook and lie it flat, paper side down, and line up the cardboard covers so they meet evenly along the spine. Then use masking tape to connect the cardboard covers to the notebook’s spine. I started by placing small horizontal pieces of tape across the spine; these go from the back cardboard, across the spine, and onto the front cardboard, almost like little bandages holding everything together. Once I had several of those across the length of the book, I added one long vertical strip of masking tape running from the top to the bottom of the spine to cover everything and seal it all in place.
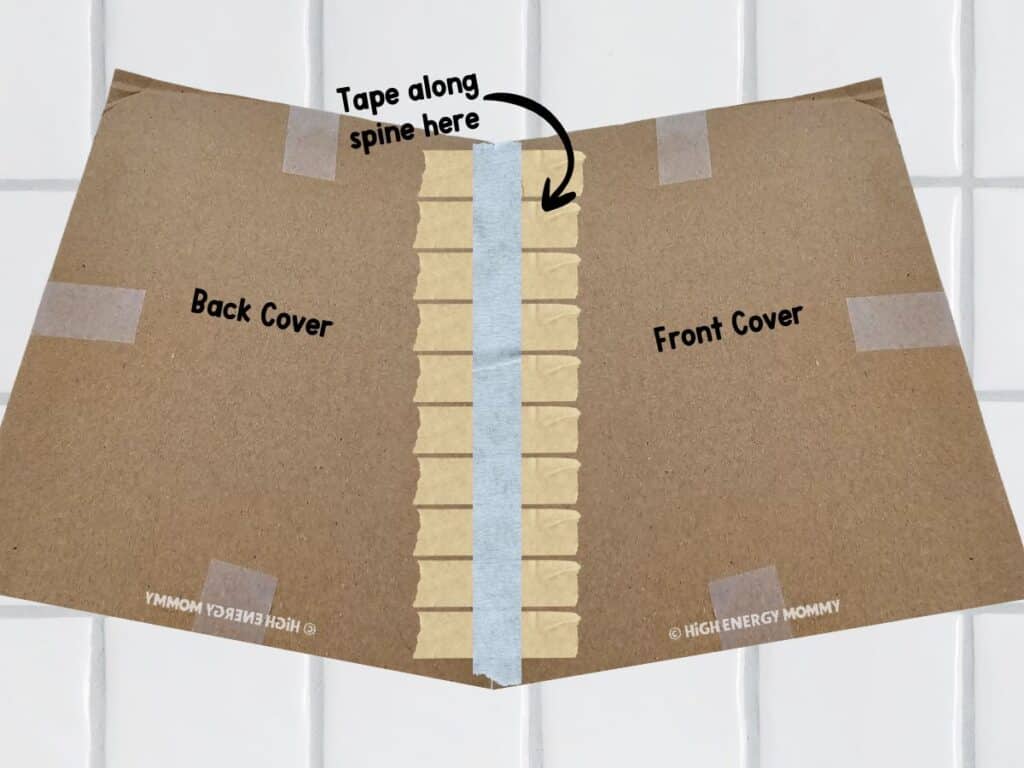
Doing this gives your spell book extra strength and a really cool textured “old book” look before you even start decorating!
Step 2: Add Your Title and Decorations
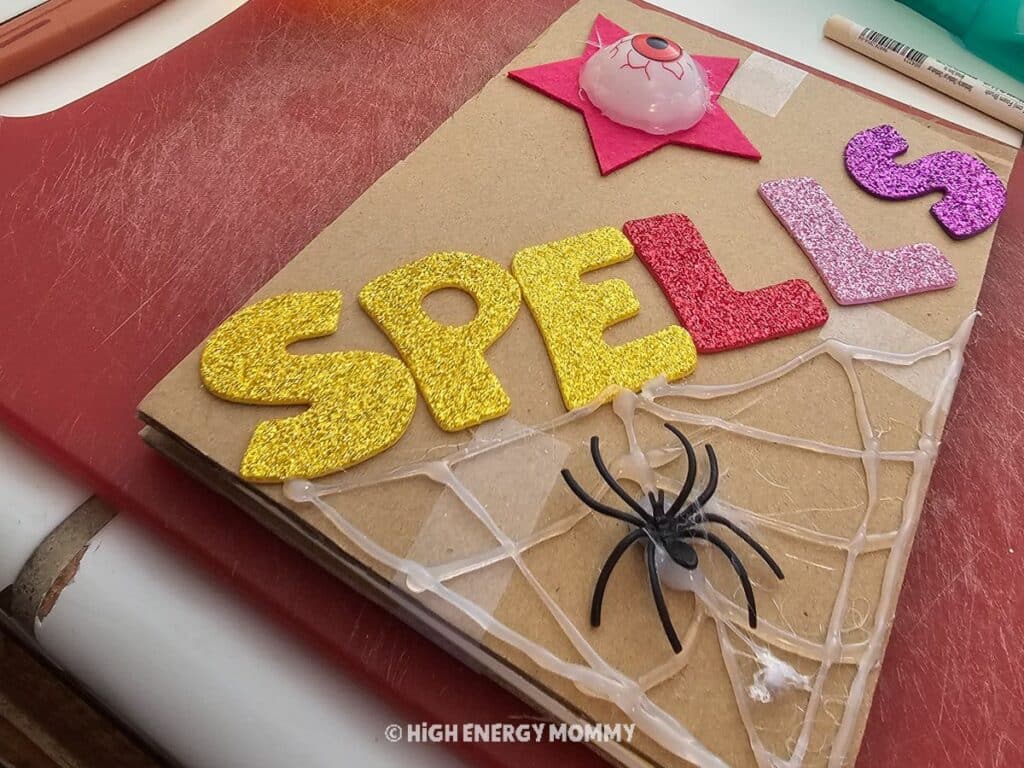
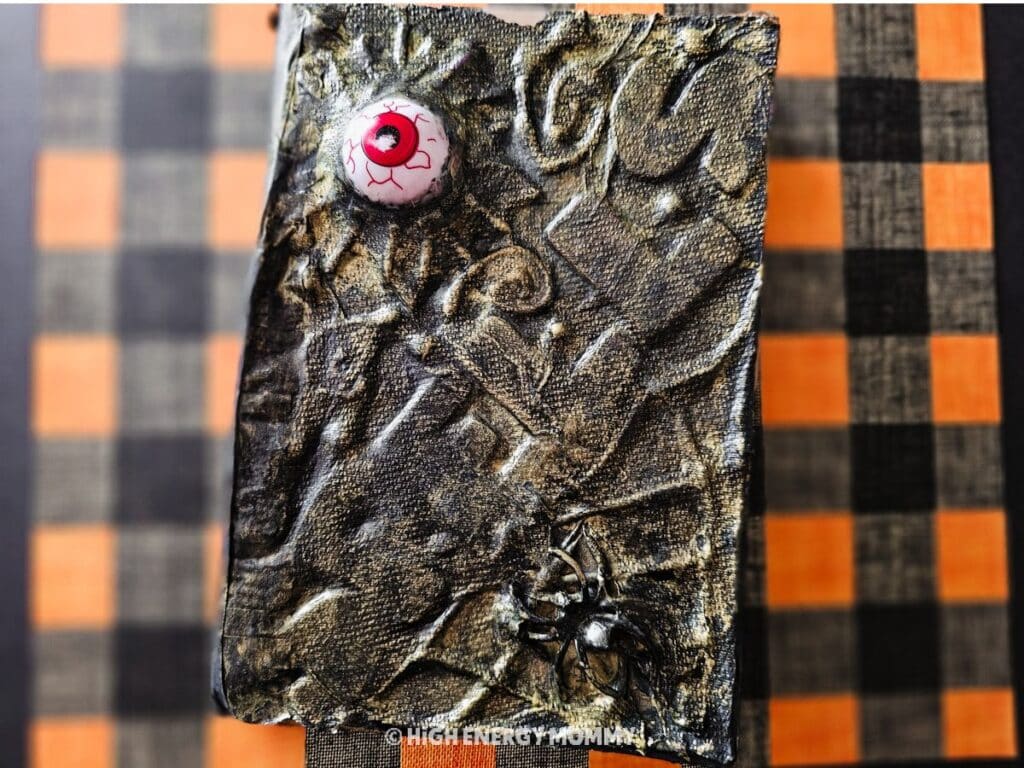
My daughter used foam stickers to spell “SPELLS” diagonally across the cover. She also added a star one corner and a plastic spider underneath. Our spider was hot glued upside down (so it sat flush) but I later realized we could have cut the legs down a bit and attached it that way. So, if you’re using a spider, shorten it’s legs so you can glue the body down without it being on it’s back.
Then then I used the glue gun to draw a web around the spider. It instantly gave the book a creepy, mystical vibe.
Optional: Add jewels, stickers, or puff paint designs. You can go minimal or completely over-the-top. Just remember to let things dry as needed before moving to the next step.
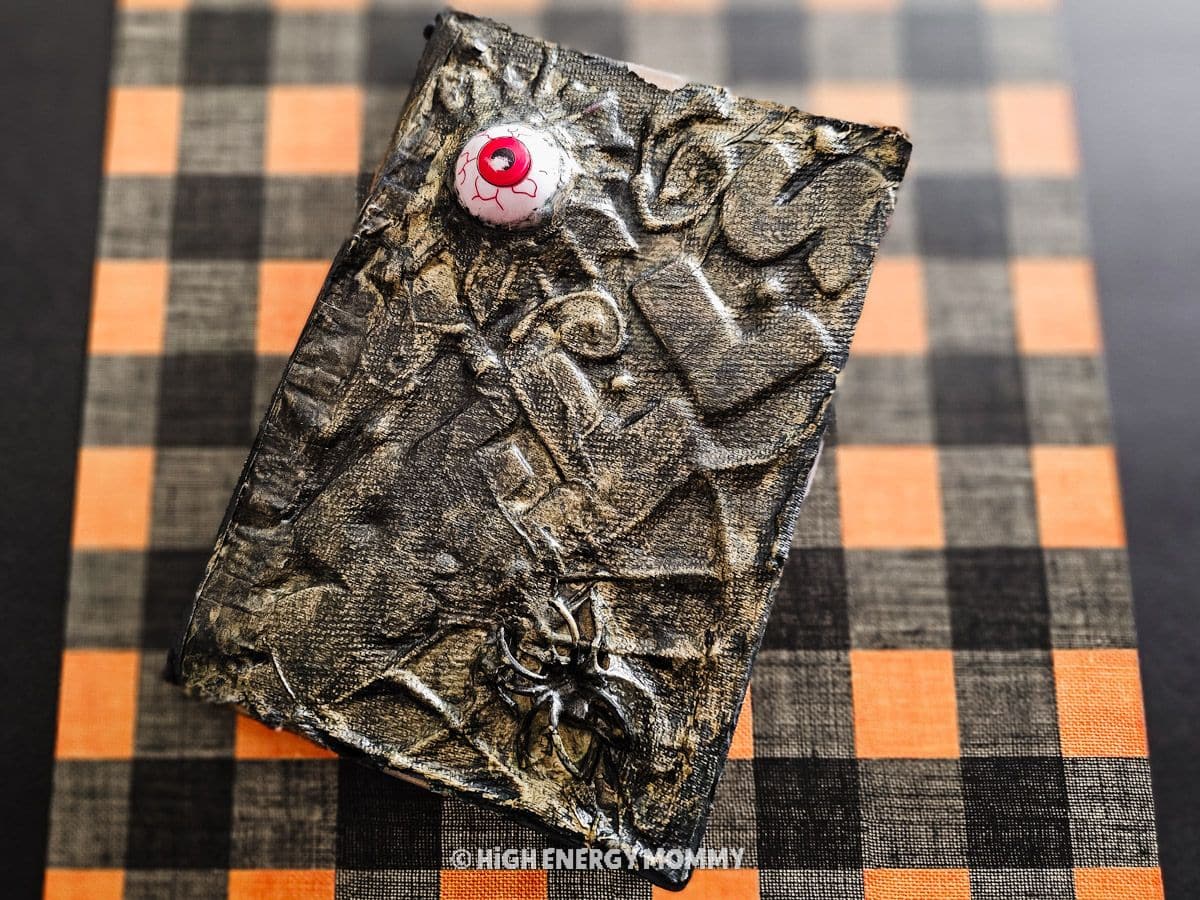
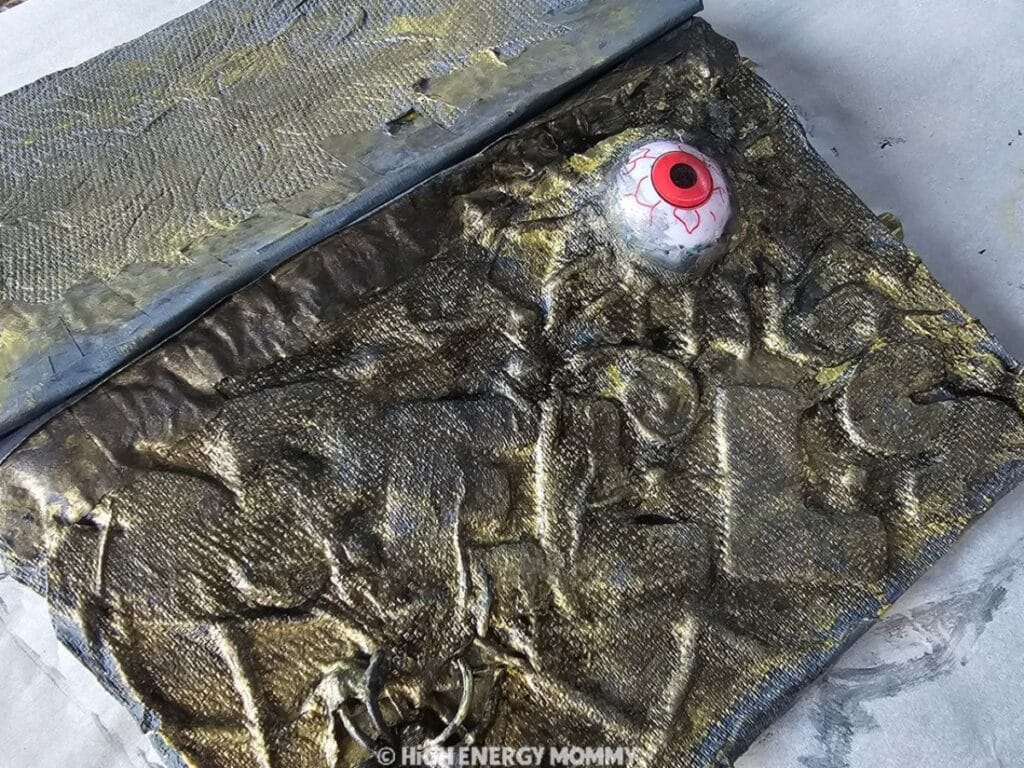
Step 3: Add the Eyeball (for Extra Spook Factor)
If you’ve ever seen Hocus Pocus, you’ll know why we did this. I sliced a ping pong eyeball in half and hot glued it to the cover. Suddenly, our book looked alive — like it could blink at you when you weren’t looking!
Step 4: Draw with Hot Glue (Parent Supervision Recommended!)
Here’s where things really start to take shape — but heads up: this step involves hot glue, so make sure a grown-up is handling the glue gun or closely supervising.
For younger kids, have them describe or sketch out what designs they want; maybe some spooky swirls, lightning bolts, or webs, and then you can use the glue gun to create those shapes for them. For older kids, let them take the lead with careful supervision.
Use the hot glue to draw raised designs right onto the cover (and back cover if desiered): lines, swirls, dots, borders, or even rays coming out from the eyeball if you added one. These raised designs will pop out later once everything’s painted, giving your spell book that bumpy, old, hand-carved texture. Let the hot glue cool completely.
Step 5: Add Texture with Paper Towels
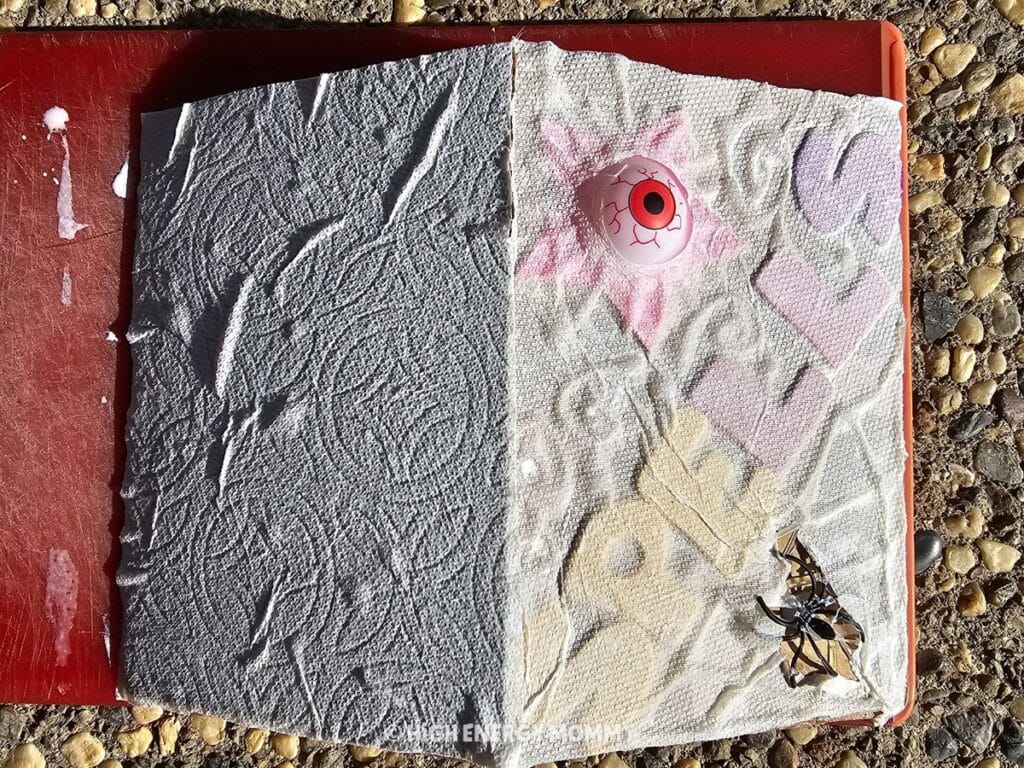
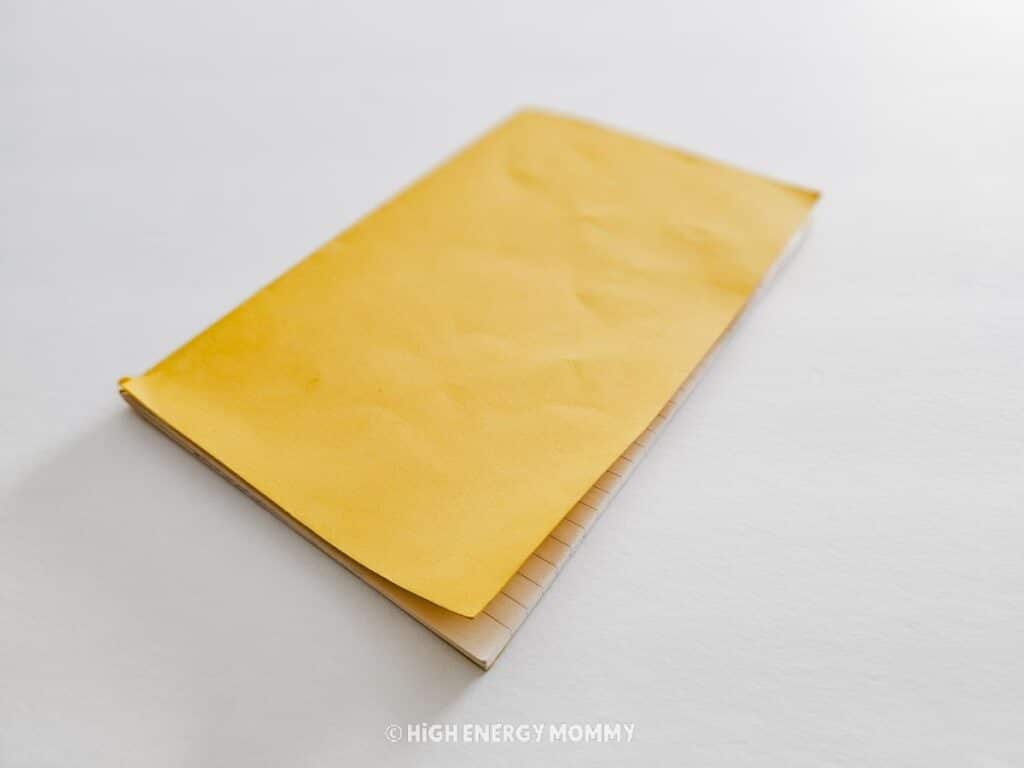
Here’s the real transformation trick: once the hot glue is cooled, lay paper towel pieces over the front and back covers, brushing Mod Podge on top and pressing them down into the glue designs. The paper towels with textured designs work best, but plain paper towels will work fine. You can do this only on the covers *or* you can extend this step to the inside covers too.
This step create an ancient leather-like texture on the book. Be sure to press firmly so the raised letters and shapes still show through. Cut around the eyeball and spider so they stick out. Add a final Mod Podge coat and let everything dry overnight or for a couple of days, depending on your climate.
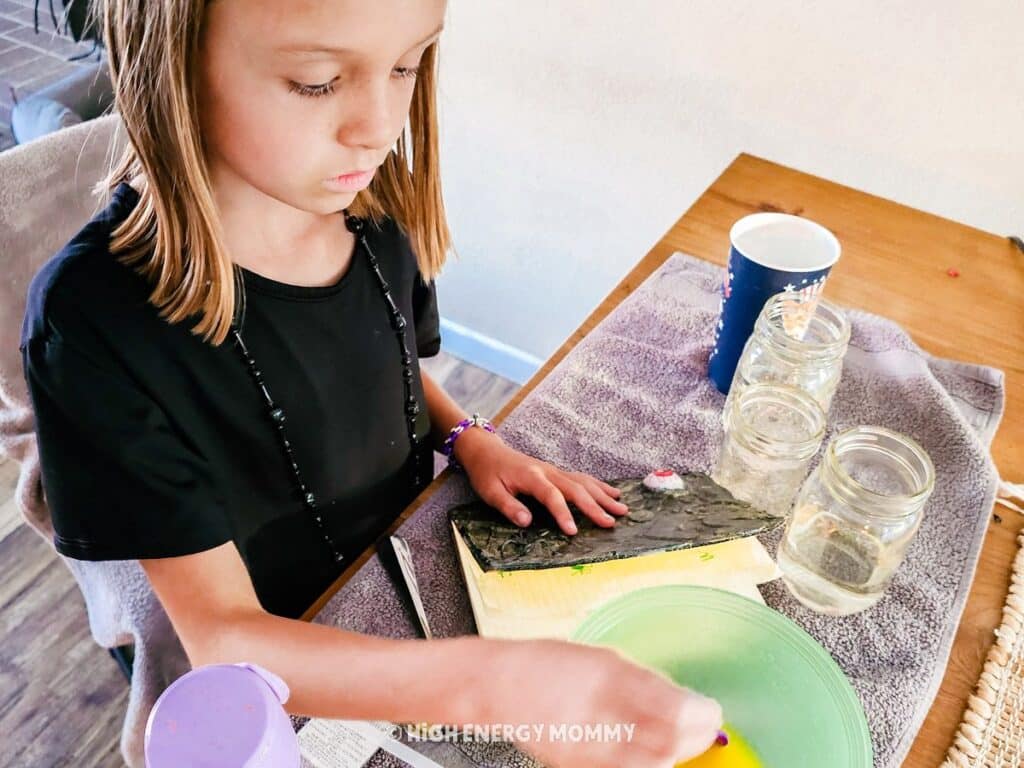
Step 6: Paint the Book
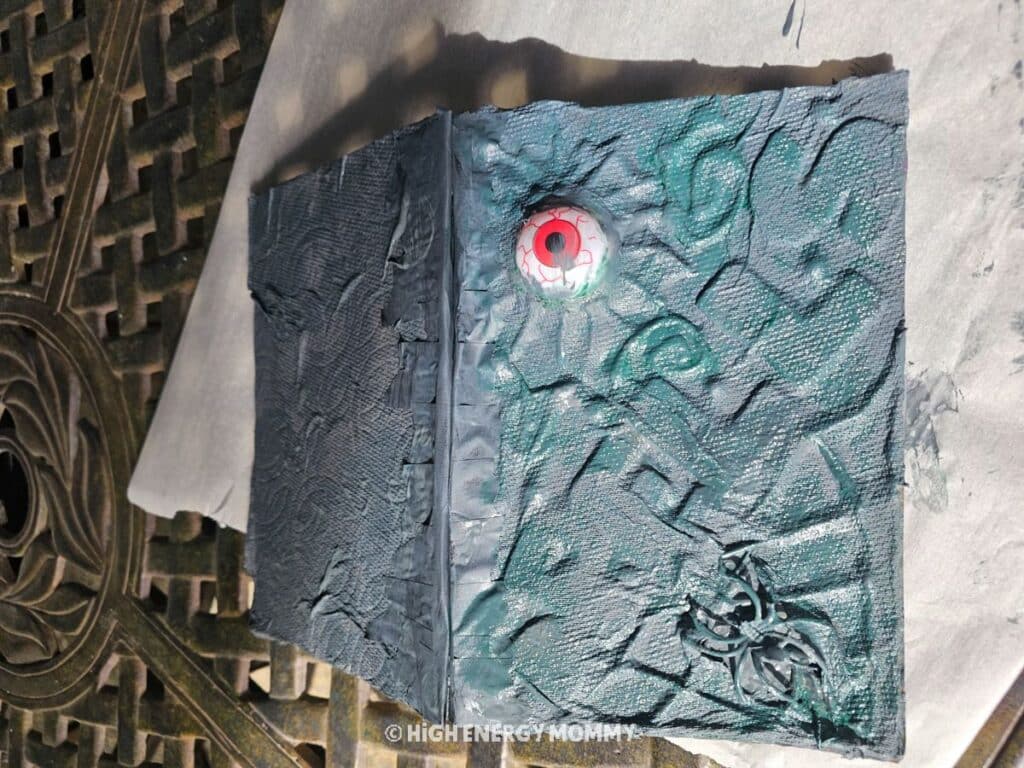
Once dry, it’s time to paint. My daughter covered the entire book in a mix of green and black acrylic paint. While it was still wet, we dabbed it with a paper towel to remove some color and create an aged, distressed look. Let it dry overnight.
Step 7: Add Finishing Touches
The next day, she brushed gold paint lightly across raised areas to highlight the textures. This really made the letters and glue designs pop. Once the gold dried, the spell book looked like it had been sitting on a witch’s shelf for 300 years.
Step 8: Seal with Mod Podge
After all your paint layers are completely dry, brush on one final coat of Mod Podge to seal and protect the paint and give your book a subtle sheen. Let that dry completely before handling the book again.
And just like that, we had a DIY spell book worthy of Ivy and Bean, Hocus Pocus, and every imaginative kid out there.
Tips and Tricks for Success
- Drying time is key. This isn’t a one-day craft. Plan on at least 2–3 days with drying time in between.
- Encourage creative freedom. The “messier” the designs, the more authentic the book will look.
- Make it personal. Instead of “SPELLS,” kids could label their book “Potions,” “Secrets,” “Magic Recipes,” or their own made-up title.
Use what you have. Don’t have an eyeball? Use a big jewel, button, or bead instead.
What to Write Inside Your Spell Book
Here’s the best part: filling the pages! Encourage your kids to let their imagination run wild. Some fun ideas include:
- Original Spells: “The Clean Room Spell” or “The No-Brothers-Allowed Spell.”
- Potion Recipes: Mix five gummy worms, two drops of lemonade, and a dash of sprinkles for “Happy Juice.”
- Magic Symbols: Draw their own witchy symbols or made-up alphabets.
- Silly Rhymes: Rhyming spells are a sneaky way to practice poetry.
- Secret Codes: Invent a coded language to hide spells from nosy siblings.

Why This Craft Is Perfect for Reluctant Writers
As a homeschool mom, I’m always on the lookout for ways to make writing less of a battle. Making this Spell book is gold for achieving this. Instead of sitting down to “write sentences,” kids get to create spells, which feels more like play than schoolwork.
- They practice handwriting without even realizing it.
- They get creative with spelling (pun intended).
- They learn that writing can be fun, expressive, and completely their own.
My daughter, who usually groans about writing, happily filled her spell book with page after page of imaginative creations. That alone makes this project worth every bit of glue and paint.
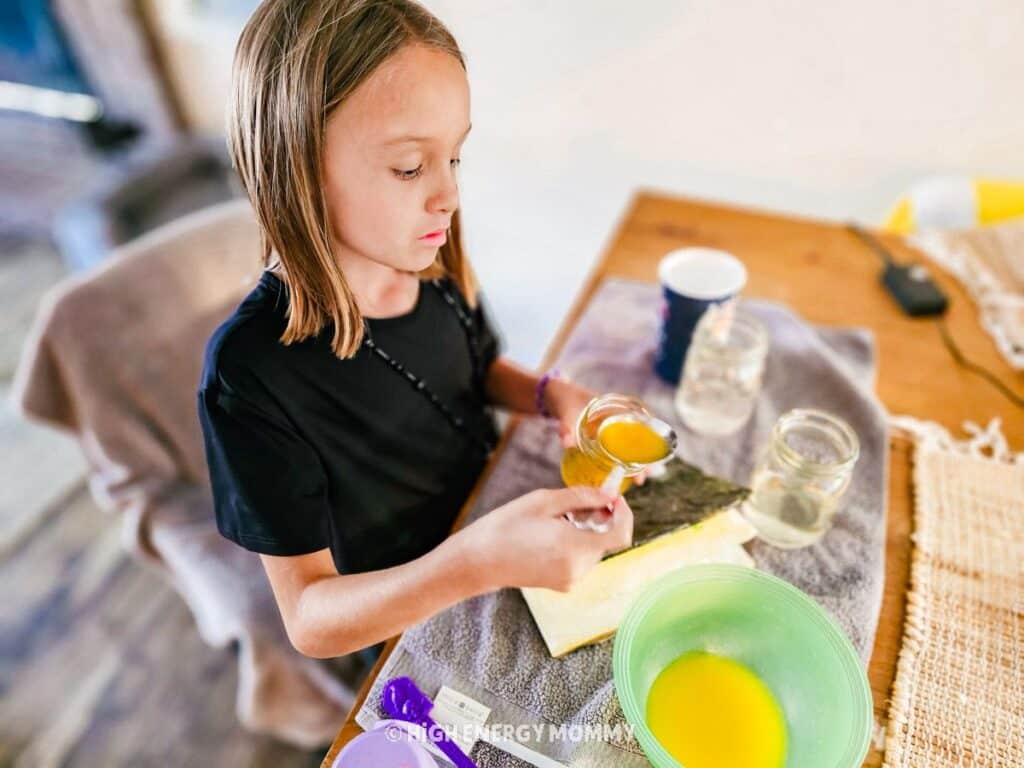
Take your DIY Spell Book to the next level! Grab my free Potion Lab and Recipe Cards Set!
It’s a simple printable set with silly ingredients, a master “Potion Key,” and a few creative recipes to help kids invent their own spells.
To make your potion lab setup extra fun (and easy to clean up), here are a few things we love using:
- A plastic cauldron (this cauldron set is great for multiple hands and large and small experiments)
- Plastic cups, bowls or plastic potion bottles for holding your ingredients
- Sensory tools like droppers, plastic tweezers, and scoops that were made for fine motor skills
Kids can scoop, mix, and name their potions, then record their recipes right inside their DIY spell book. It’s one of those activities that feels totally magical and sneaks in handwriting, imagination, and sensory play all at once.
Keep Those Imaginations Going…
This DIY spell book craft is one of those projects that checks all the boxes — it’s fun, creative, a little spooky, and (shh…) secretly educational. Sure, it takes a little patience with the drying time, but the end result is so worth it. Your kids will feel like real spell-casters, and you’ll have a keepsake that looks straight out of a storybook.
Whether you’re making it for Halloween, inspired by a favorite series like Ivy and Bean, or just trying to get a reluctant writer to put pencil to paper, a homemade spell book is pure magic.
If your little witches and wizards are still in full-on spooky mode, you’ll love my 31 Halloween Activities for Little Kids — tons of easy, hands-on ideas that pair perfectly with this craft. And browse my 31 Halloween Picture Books for Kids, which are full of stories your kids can read while adding to their own book of spells.
So grab a notebook and let the enchantment begin! Before you know it, your kids will be mixing potions, casting spells, and writing their own magical adventures.