If you’re looking to spark excitement and imagination in your kiddo, a dinosaur theme is the perfect way to make learning feel like a real adventure! Preschoolers love these prehistoric creatures (seriously, I had no idea how much until I had a preschooler) so having a random dino-themed week (or day) is really exciting for them. Especially since there are so many ROAR-some things you can do! And especially in homeschool. Honestly, watching my daughter’s creativity come out with these dinosaur activities and crafts, made this weeks theme up there with one of my favorites!
This post may contain Amazon, or other, affiliate links for products that I personally use and recommend for kids and homeschool learning. This means I will earn a small commission if you purchase through my link, and if you do, we thank you so much! For more information, please read the full Disclaimer and Disclosure.
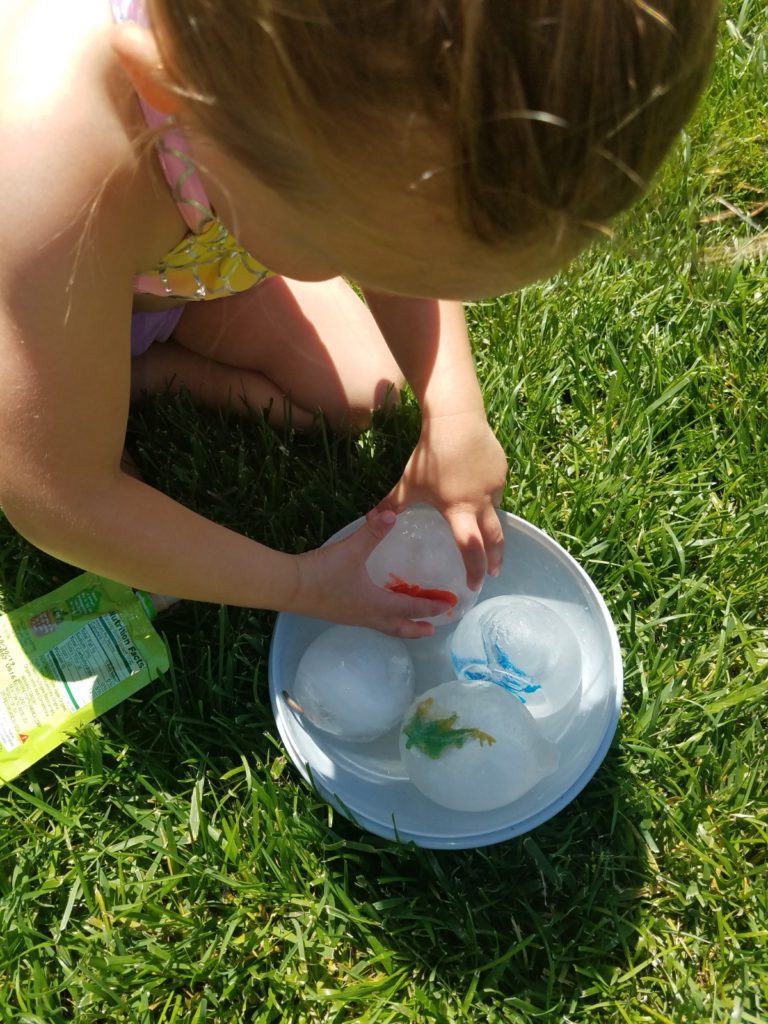
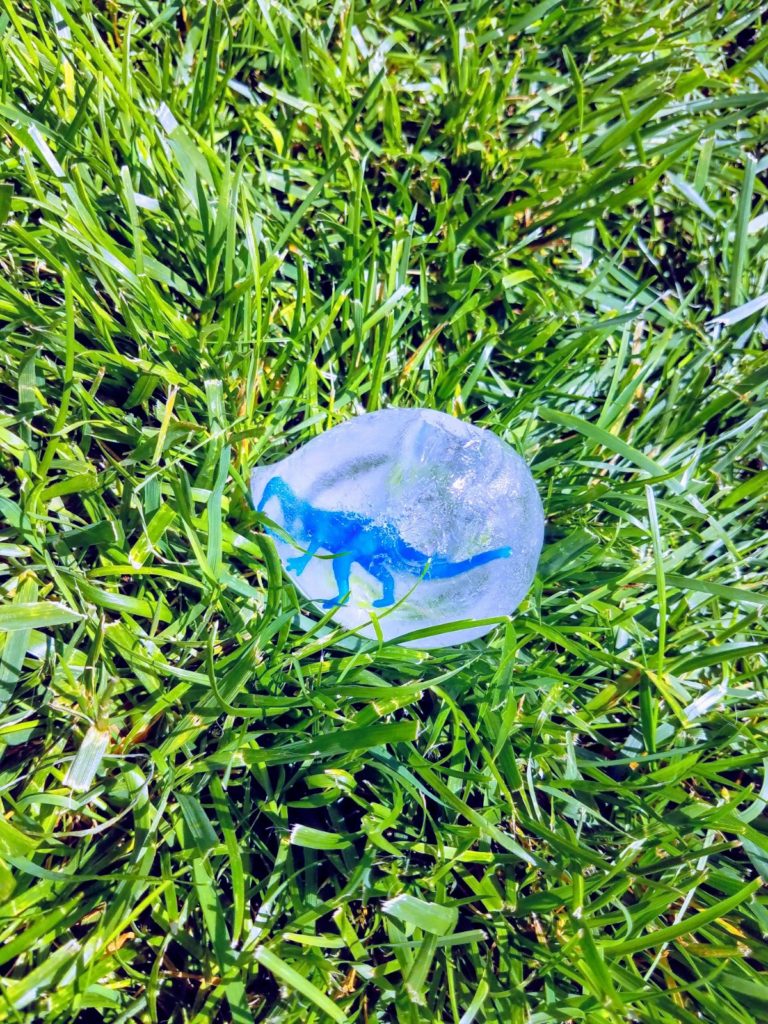
Hatch Frozen Dino Eggs – A Simple Sensory and Science Activity
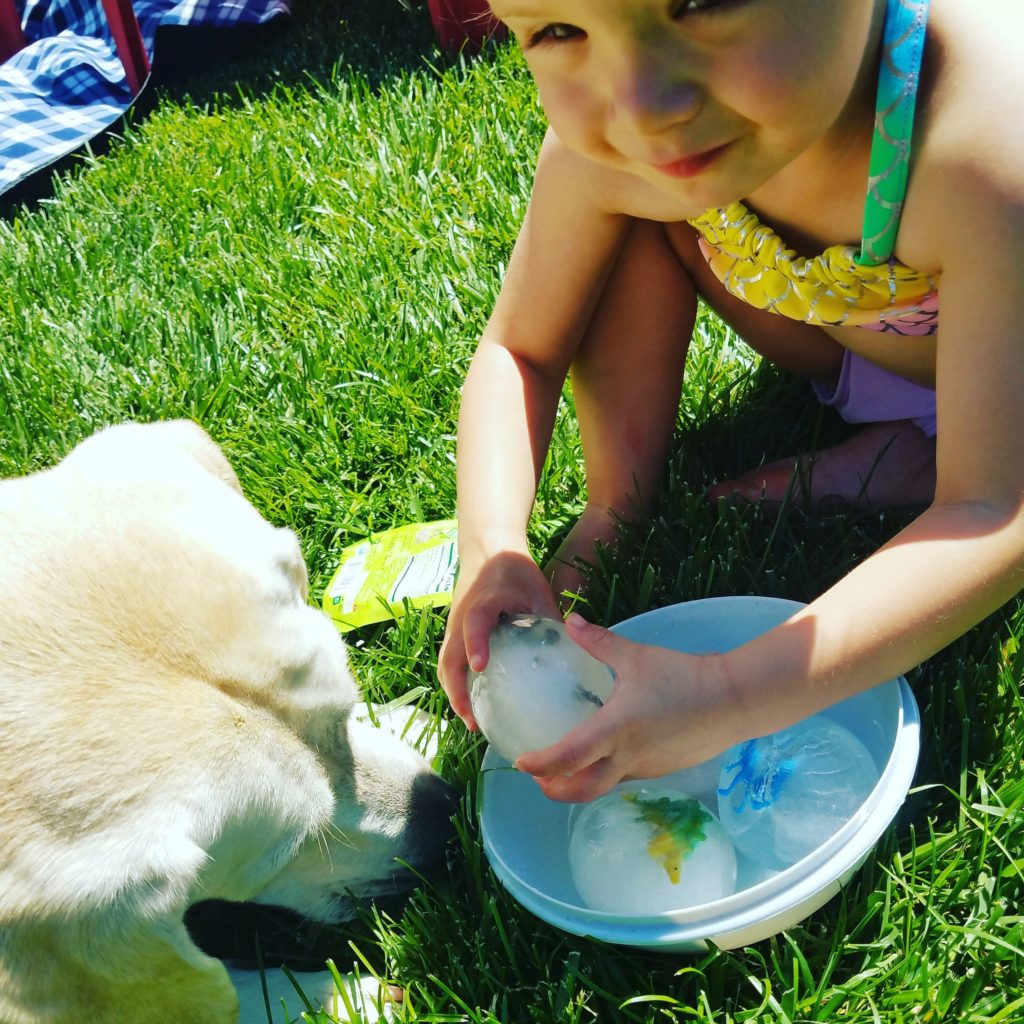
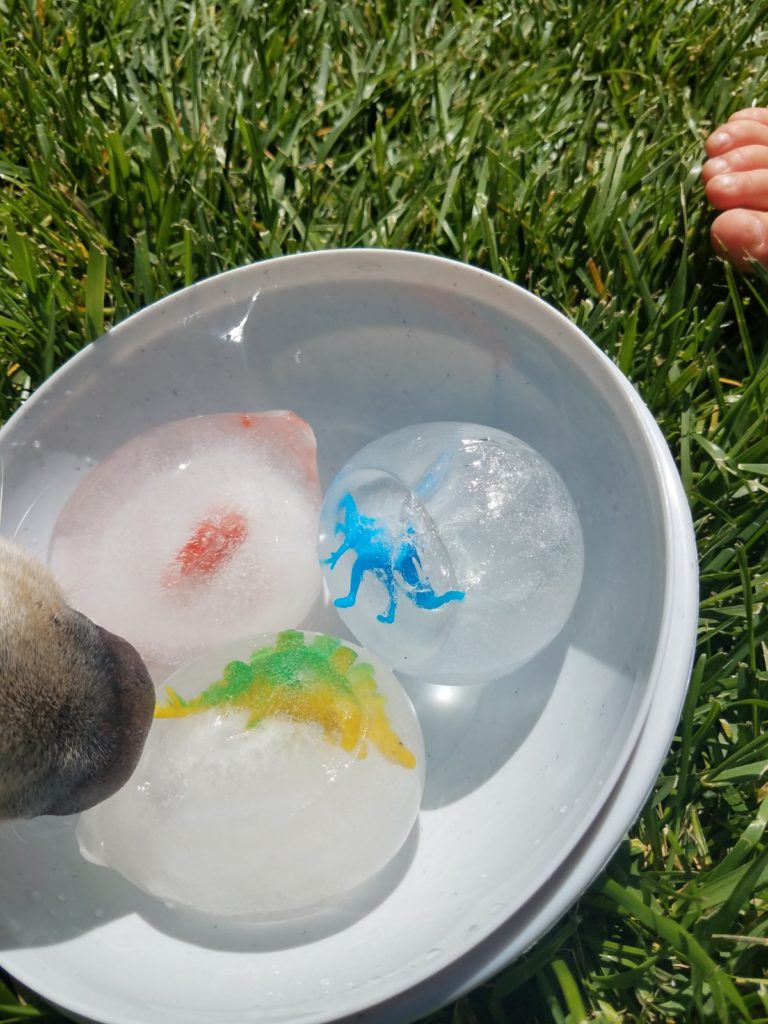
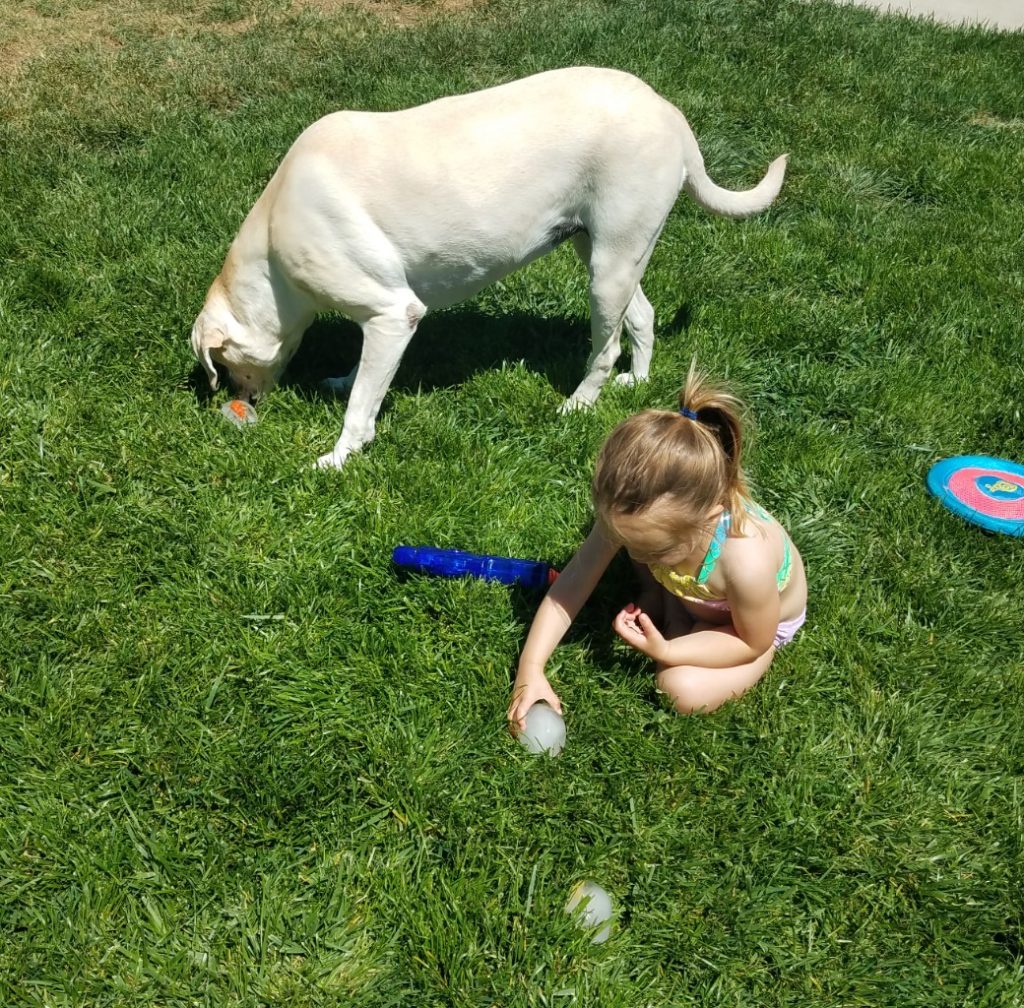
This was a great sensory and outdoor activity, especially if the weather is warm. Our dog also really enjoyed this one. The “eggs” are made of ice and when they “hatch” a baby dinosaur is “born”.
🎉 Get $20 Off Outschool Classes!

Note: these eggs require freezing so it’s best to prepare these a day or so before you plan to do this activity
To make these you only need a few things:
- Medium sized rubber or latex balloons
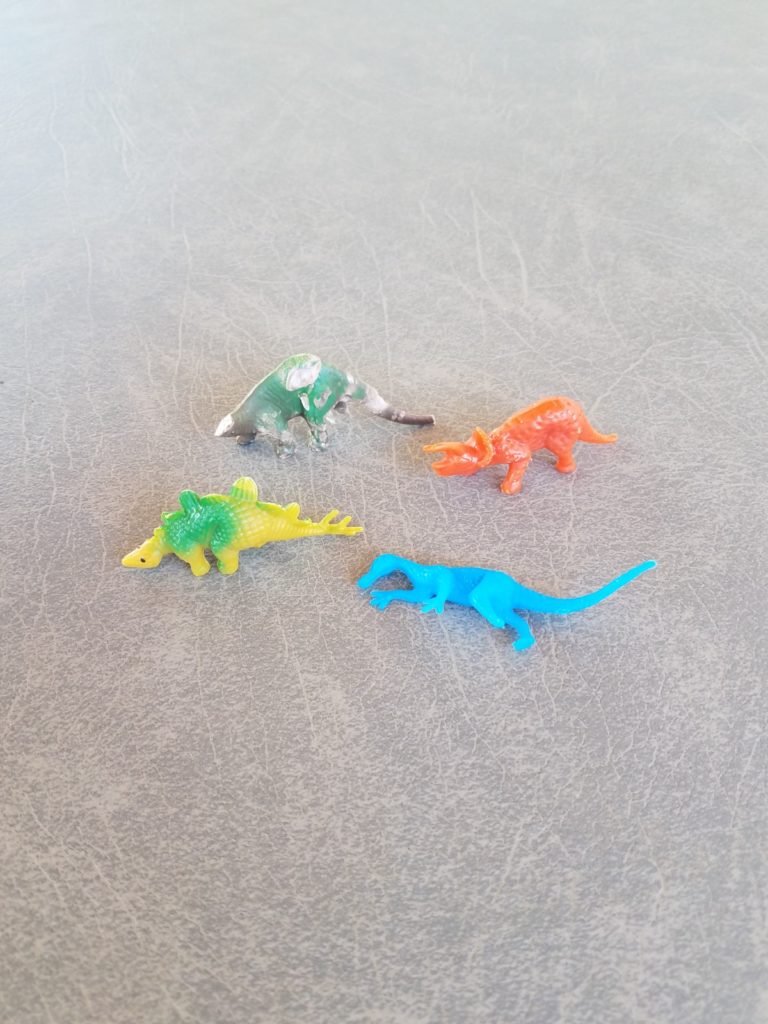
- A variety package of small, plastic dinosaurs (I bought them at a dollar store but they are similar to these from Amazon)
- Water
- Baking tray or container to use for freezing the eggs on/in
- A freezer
- Spray Bottle, eye dropper, or cup for pouring
Directions:
The first step is to carefully insert one dinosaur through the opening of each balloon. Be careful to not puncture the balloon if the dinosaur has any pointy edges (like a tail).
Next, fill the balloons with water until they’re about 5-6 inches in diameter (or until you can’t easily feel the dinosaur anymore). Tie the opening, then put the balloons in the freezer and freeze over night.
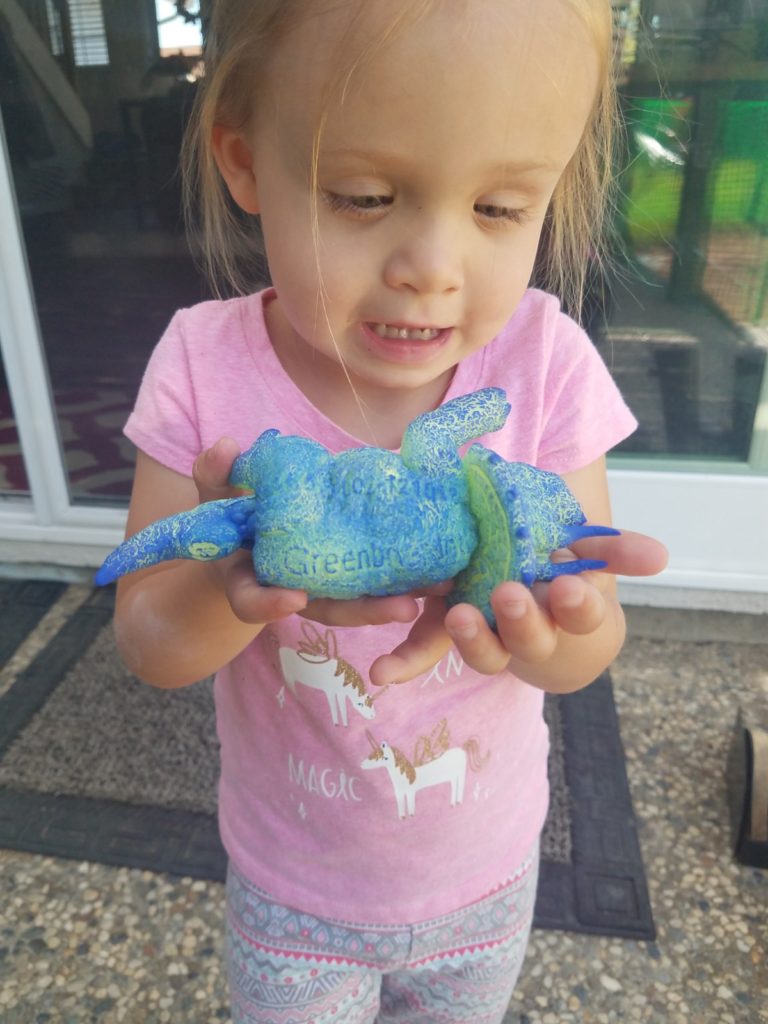
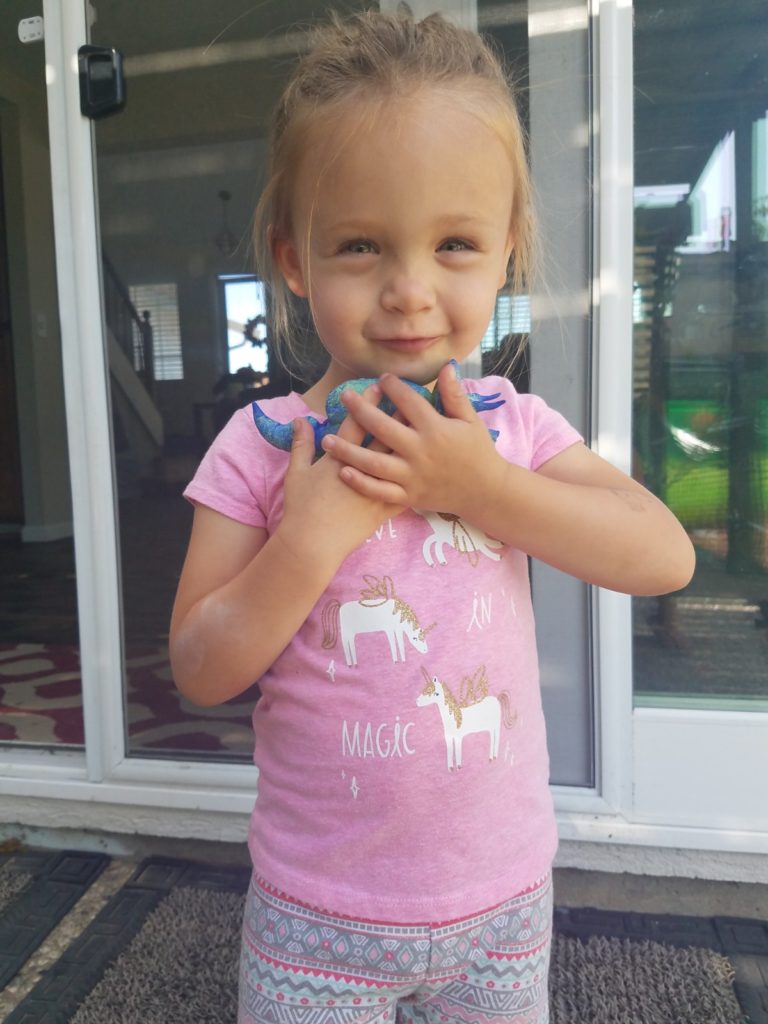
Once frozen, cut the opening off of the balloon and pull it off the ice. You should now have a large ice cube that resembles a large egg with the little dinosaur inside and it’s time for fun!
Fill the spray bottle or cup with warm (not hot) water.
To “hatch” the eggs, put them in a bowl or sensory bin (this is the bin we use), on the grass or ground, or let your kid hold them. Then use the spray bottle or eye dropper of warm water to spray the ice eggs. The spray bottle takes a while to melt the ice but it’s great because it keeps kids busy for a while. As they melt they will start cracking and making noise, and it’s fun for little paws (hee hee pun intended) to tap on and pick at.
You can also pour warm water over the eggs to speed up the process if anyone starts getting impatient (that never happens in my house….)
Since it was a hot day at our house, I took the eggs outside and let Emily (and the dog) play with them in the grass. The sun helped them to melt relatively quickly, but both of my girls also helped them along by licking the ice (and yes sometimes licking the same one too). Can you tell from the pictures which dinosaurs my dog hatched?
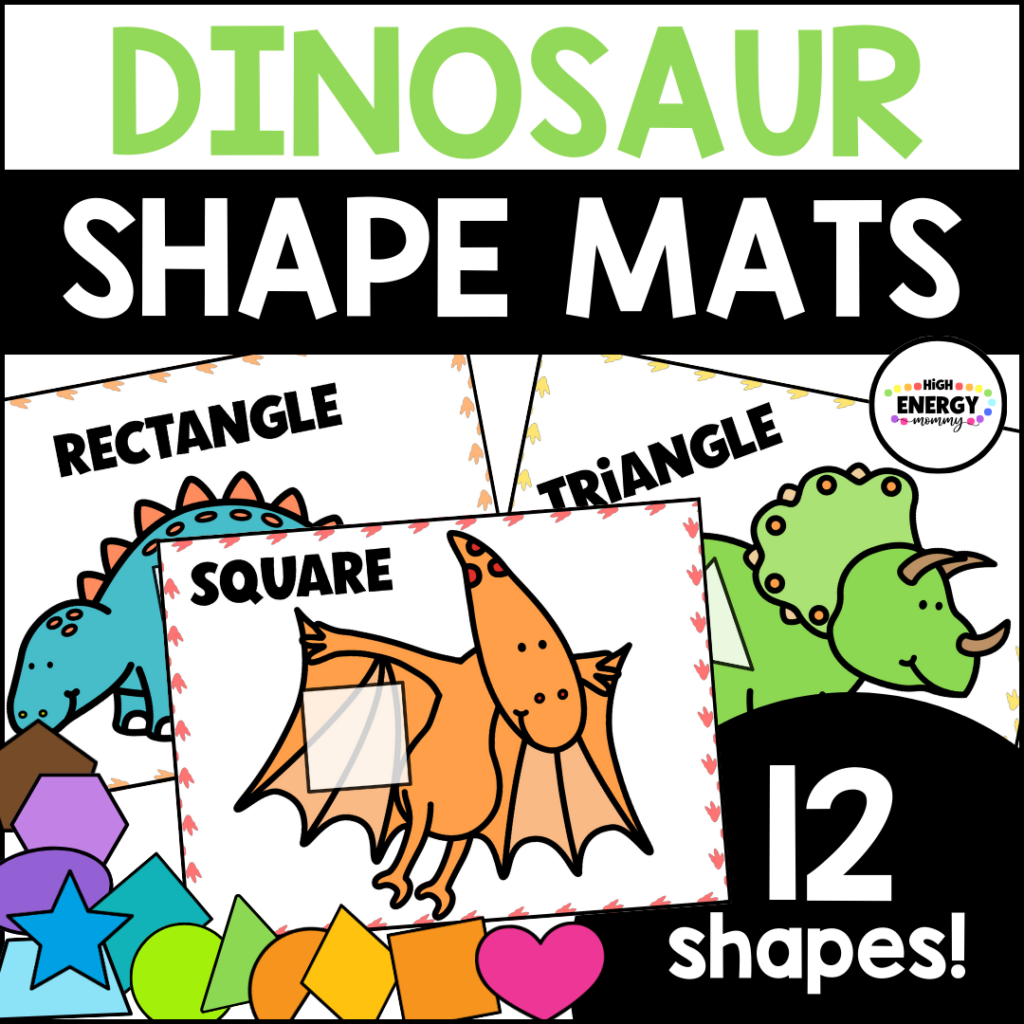
Dinosaur Shape and Color Matching
I always include some sort of shape or color matching in every preschool theme we do and this one is a lot of fun!
These shape matching activity mats have large dinosaur themed images on them. Each image has one shape cut-out of it somewhere and an individual shape that fits into the cut-out , like a puzzle piece. I designed these mats to have extra large images because a lot of dinosaurs were just that: BIG. And the larger shapes are easier to pick up with little hands.
You can purchase a set of these adorable Dinosaur Shape Matching Activity Mats from my TpT store!
*Pinterest NOTE: If you ended up here from Pinterest, I apologize but I don’t have access to the dino shape mats that were in the Pinterest image. I purchased that activity years ago and apparently I had an old link that wasn’t working.
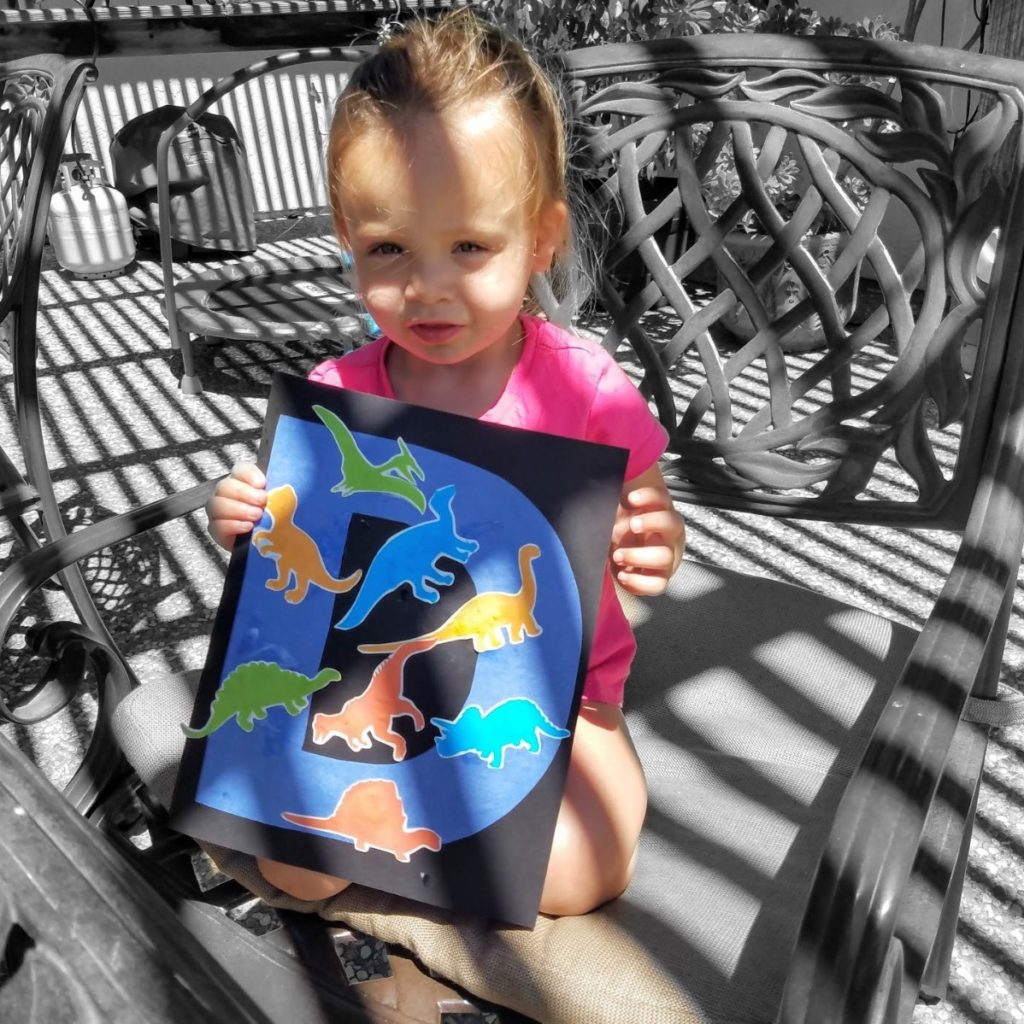
Letter of the week: “D” is for Dinosaur
This is a super simple craft and provides good motor skill practice with gluing! To make this I cut out the letter D on construction paper then glued it to a stronger piece of cardstock paper, then had Emily glue on some paper dinosaurs I had printed and cut out from clip art like this.
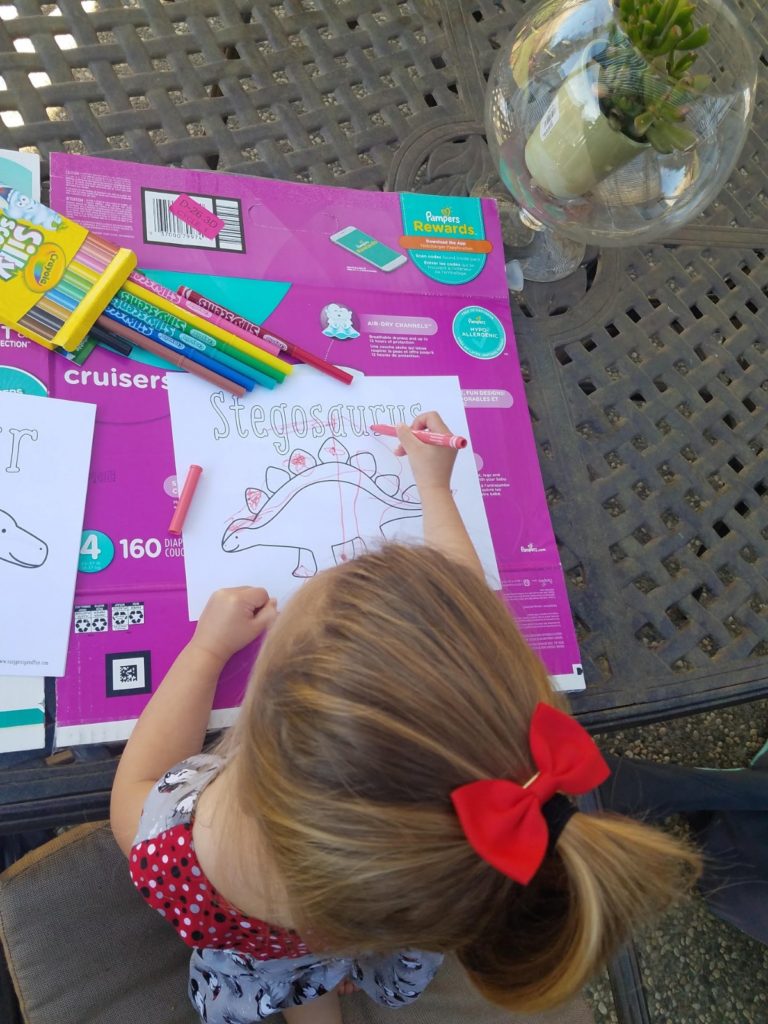
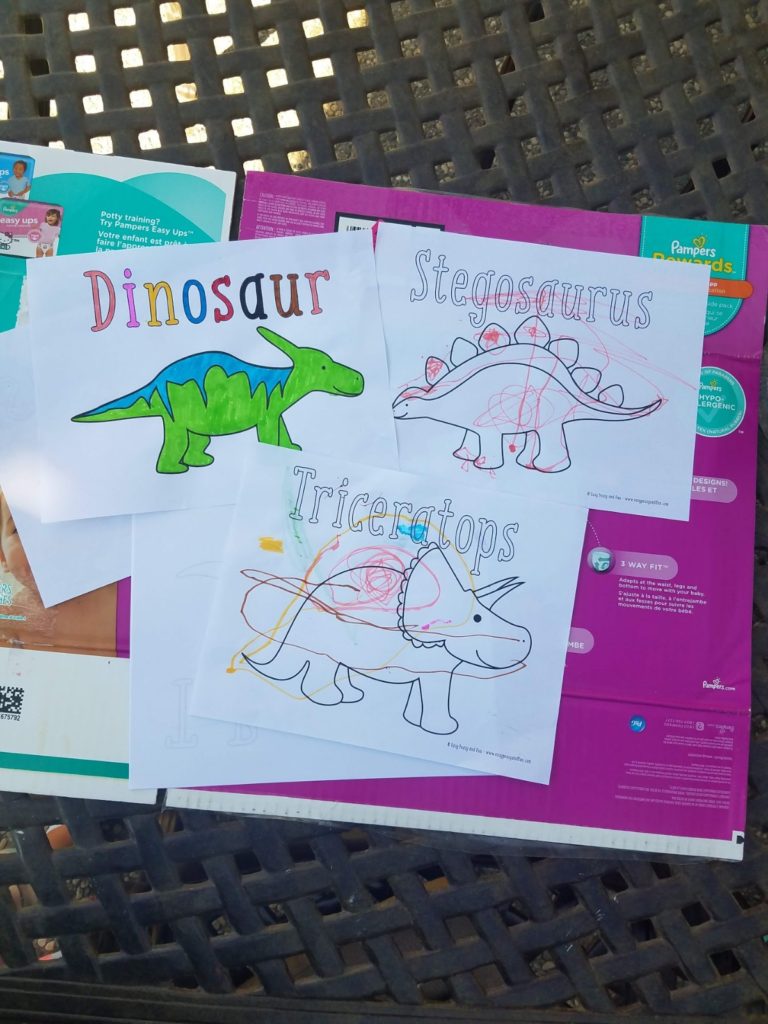
Dinosaur Coloring Pages
Emily had just received these new Crayola Silly Scents scented markers and wanted to color with them so I found these great coloring pages online from a website called Easy Peasy and Fun (and they were FREE to print). I liked them because the images are large and simple, so it was good practice for Emily coloring within the lines and sections (and they smelled really good when we were done too).
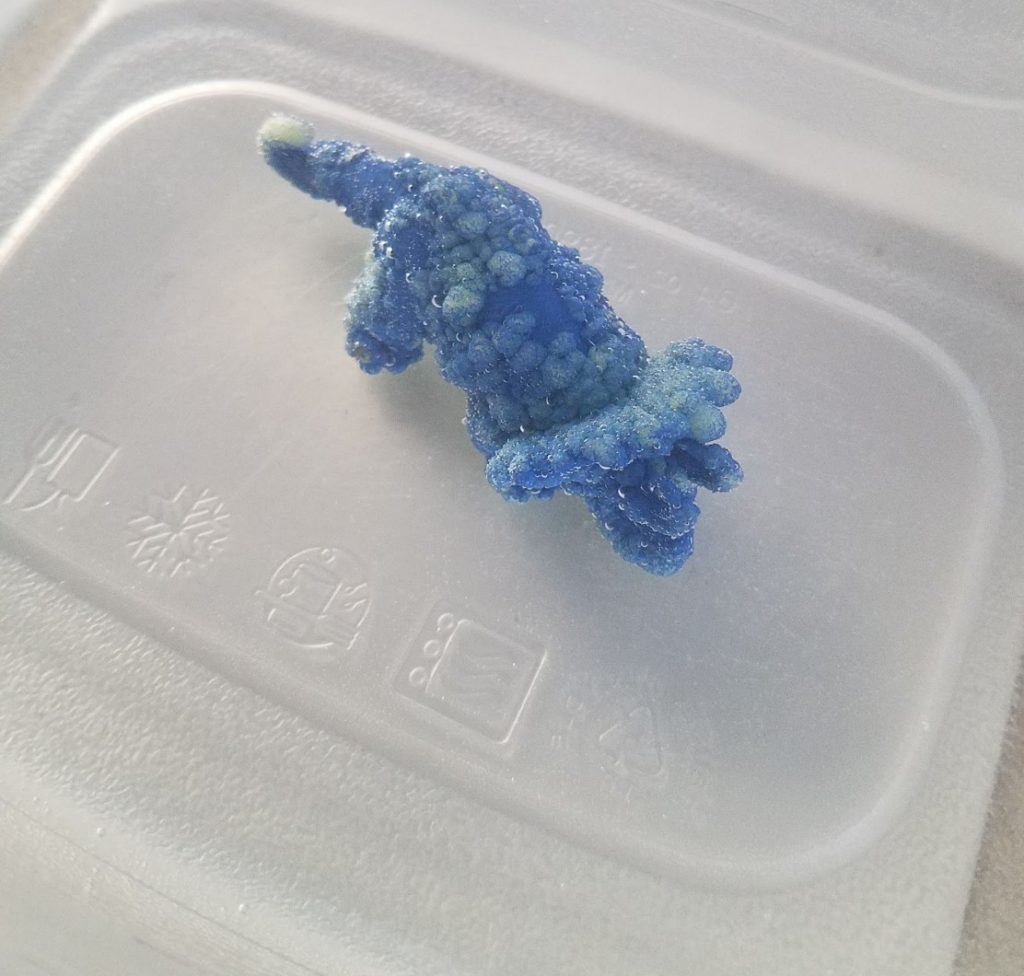
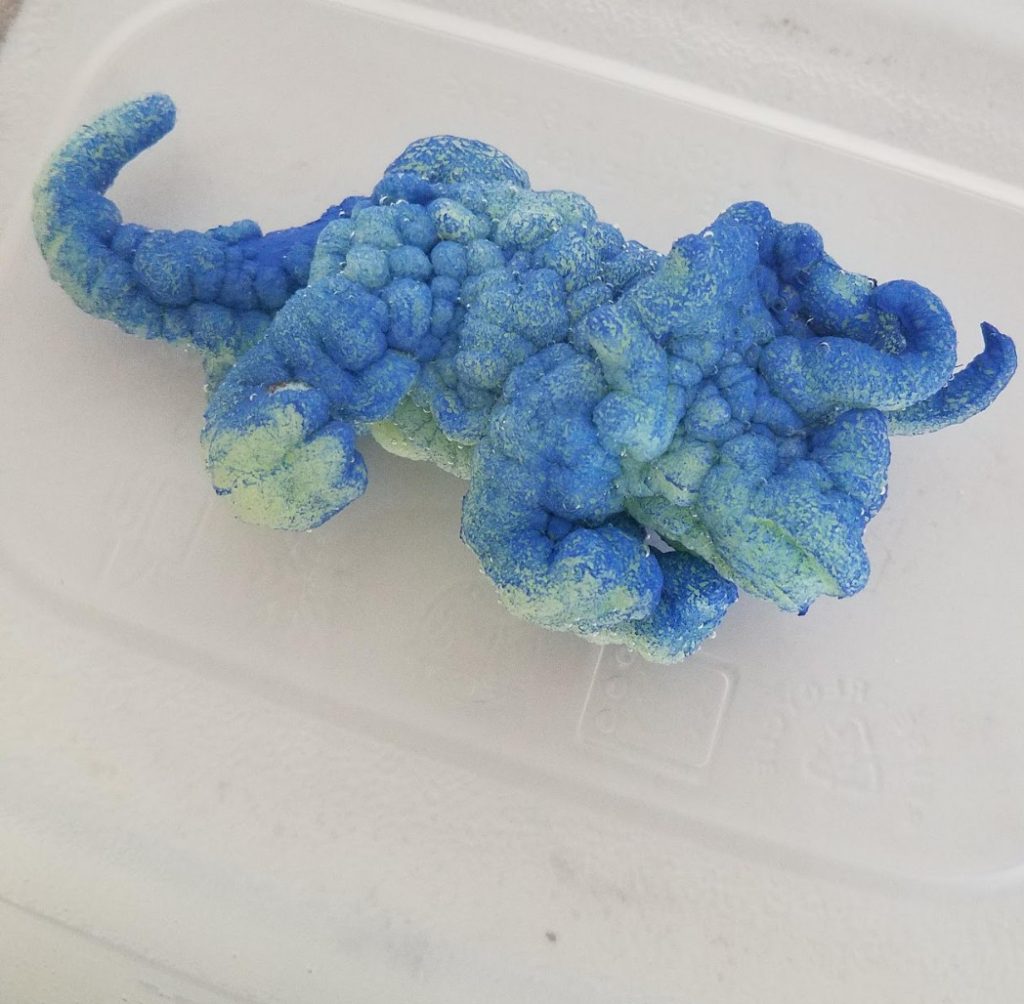
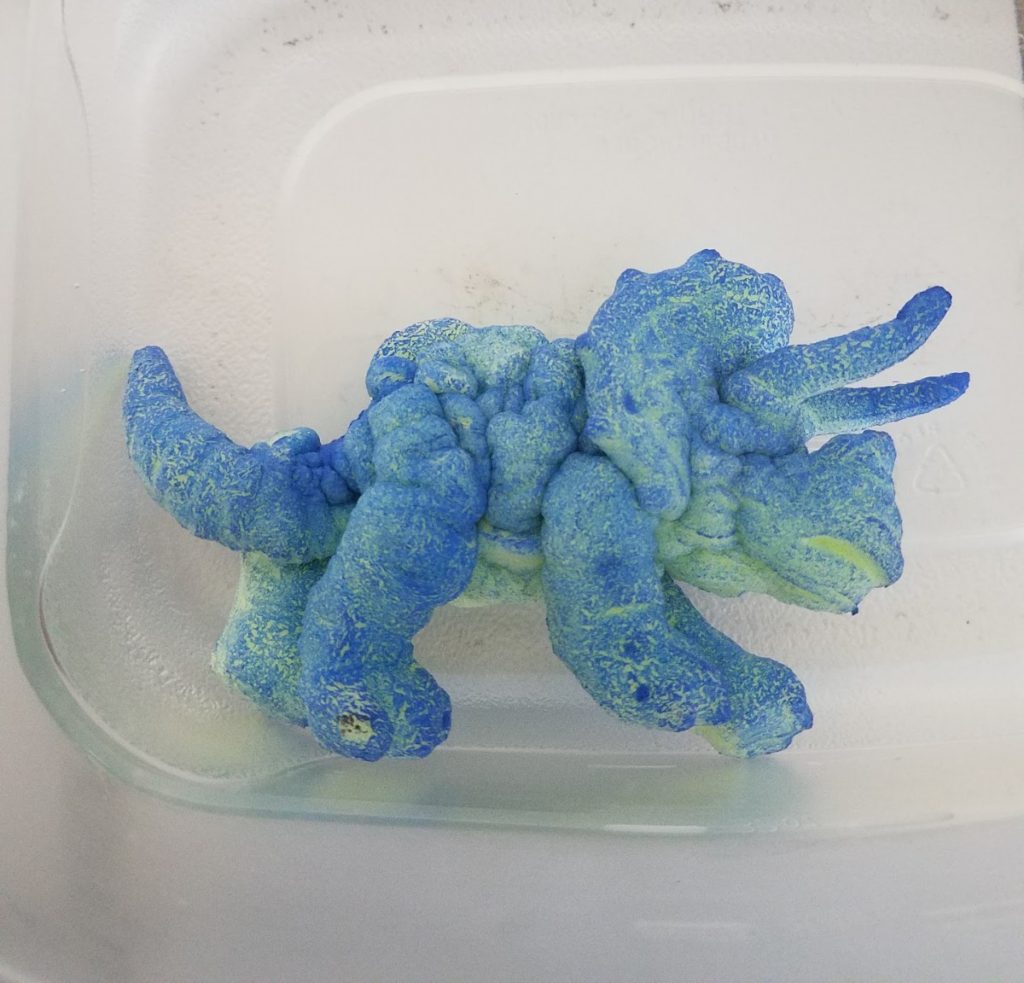
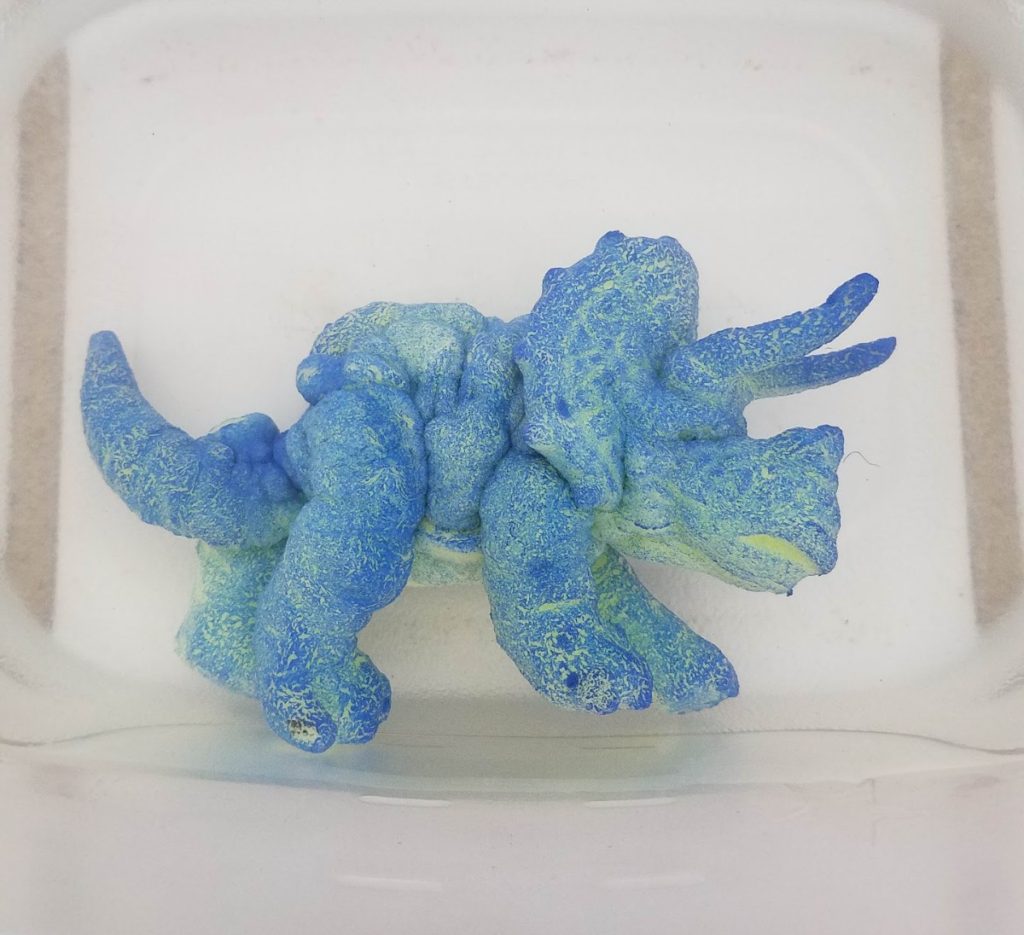
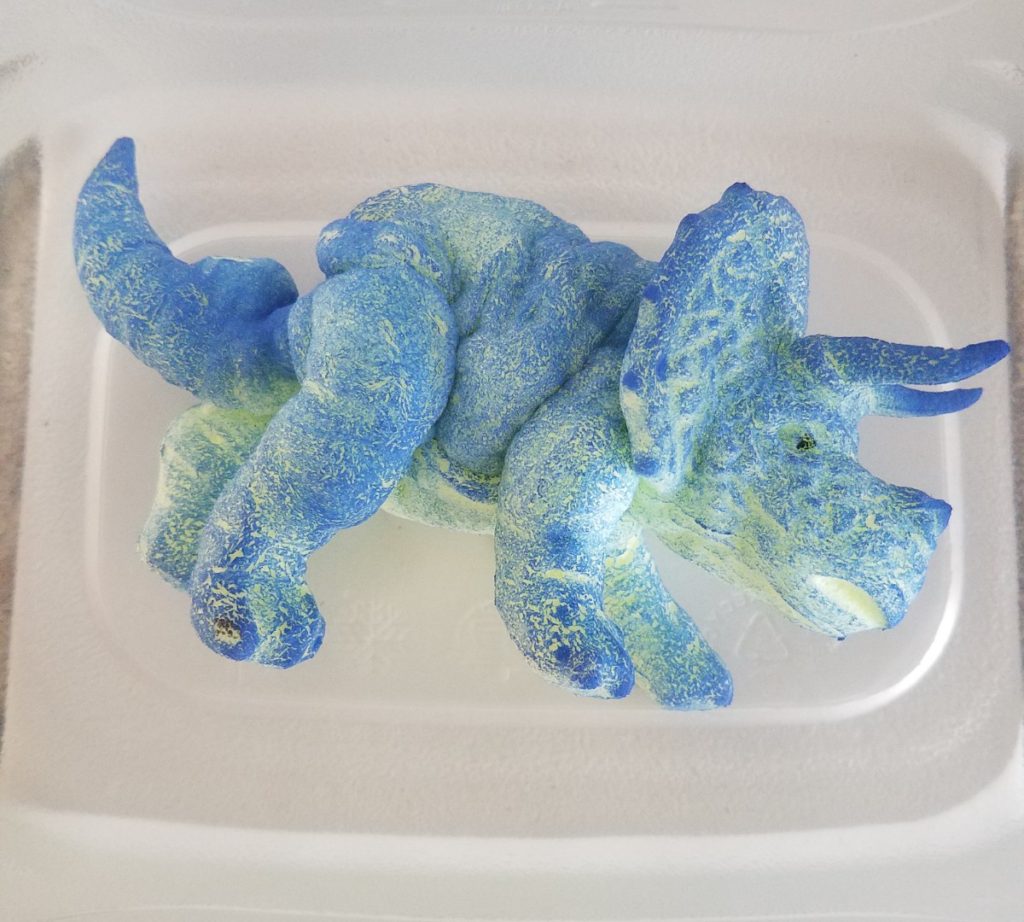
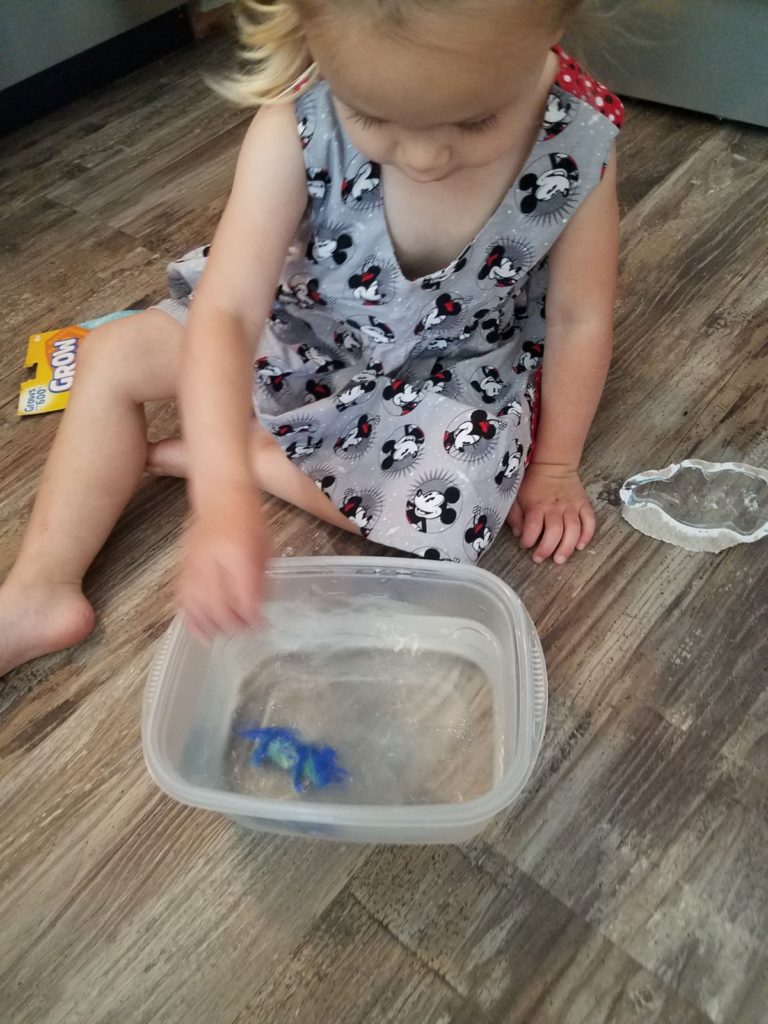
Grow a Dinosaur
This is another sensory activity Emily loved! I picked up a “”Grows in Water” toy, like these ones you can find on Amazon, and as much as it kinda grossed me out now as an adult, Emily thought it was great! It took about 8 days for it to fully grow, but she loved checking on it everyday and once it was all grown up, she carried it around and called it her baby. And then a couple days later she pulled all it’s legs off (poor triceratops) so I had to throw it away.


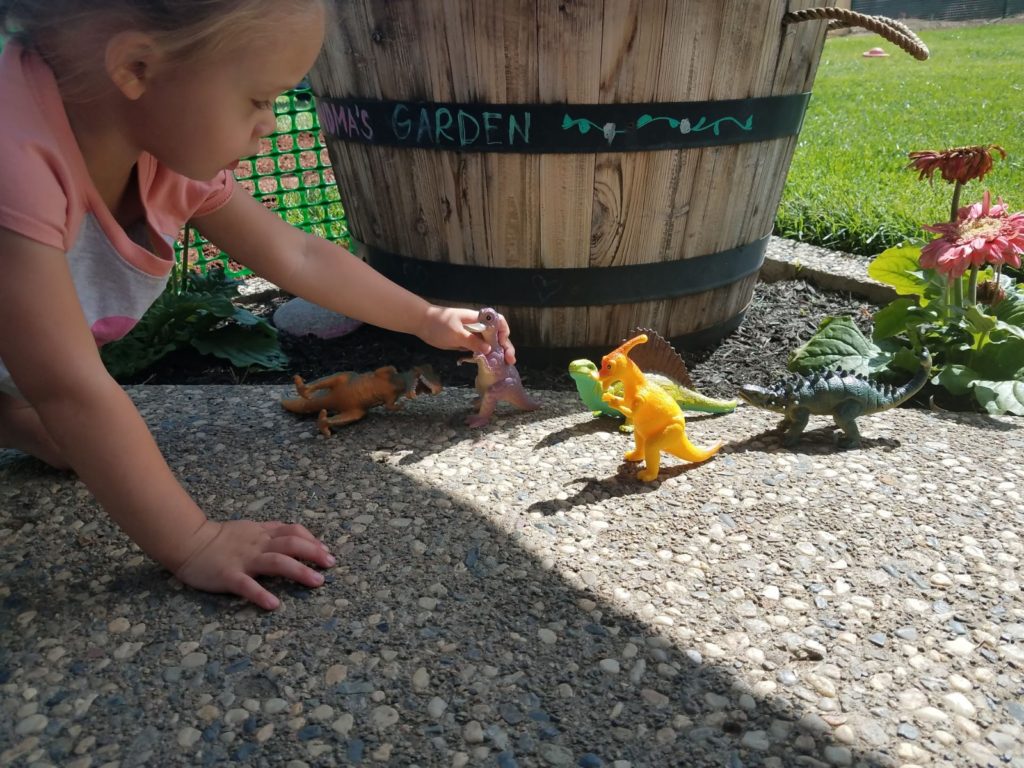
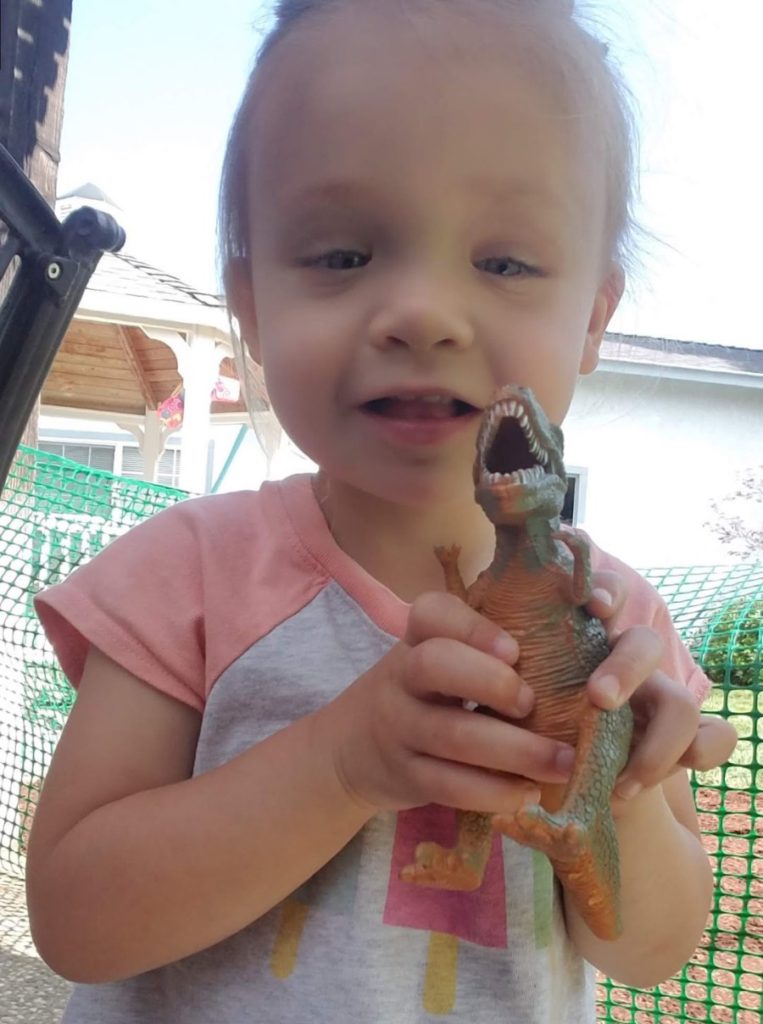
Dinosaur Figures Play Set
I purchased some large dinosaur figures and planned to set up an actual sensory bin with them, however my kid took them outside and put them immediately in the dirt! So she made her own DIY sensory bin and dramatic play area, which worked out great. She loved the T-Rex and chasing everyone around yelling “RAAAAWWRRRR”.
Sometimes you don’t even need to get that creative…just bring out some cheap toys that go along with the theme and see what happens.
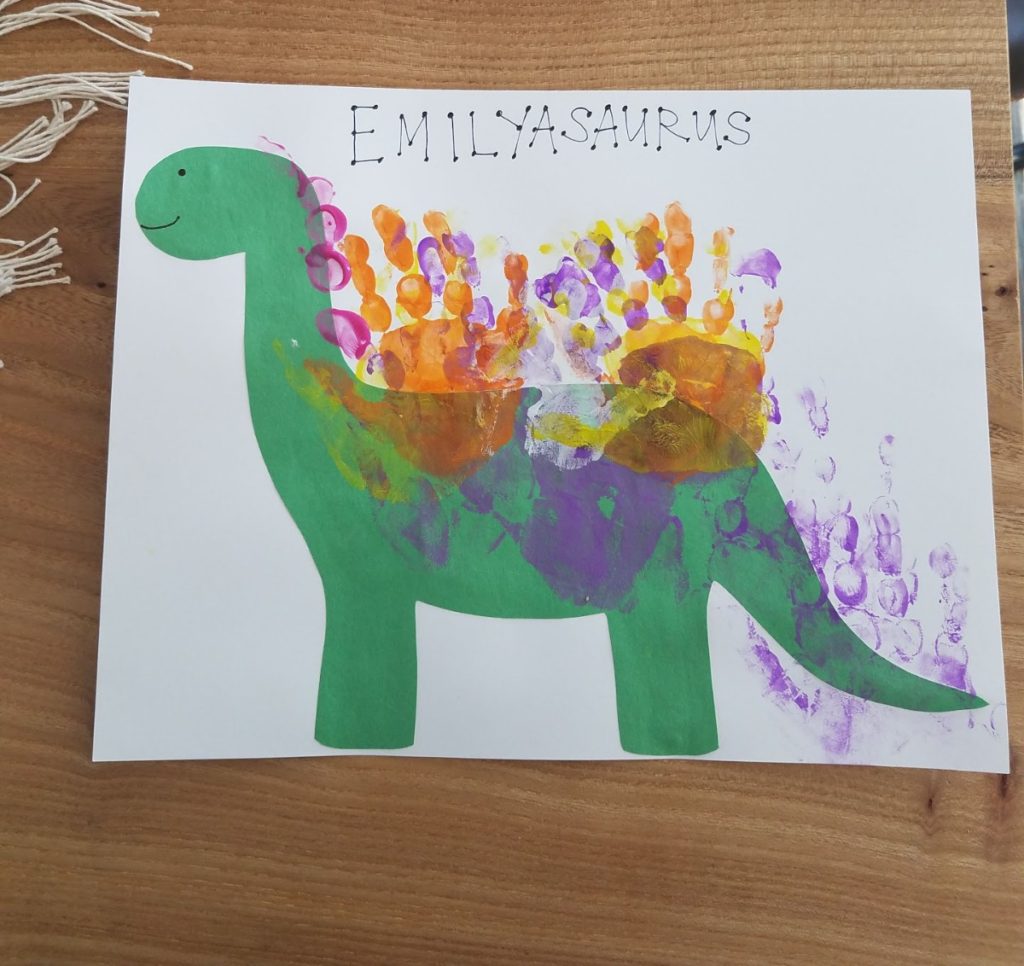
Handprint Dinosaur Craft
Of course it wouldn’t be a normal week if Emily didn’t do some sort of painting with her hands (or feet). I saw an idea similar to this on Pinterest but they had drawn their own dinosaur and if you remember, this mommy does not have very good drawing skills. So I cheated and cut a dino silhouette out of construction paper and then let Emily get a little carried away with the hand and finger prints. And thus, the Emilyasaurus was born (and below is a short little clip of this loud little beast).
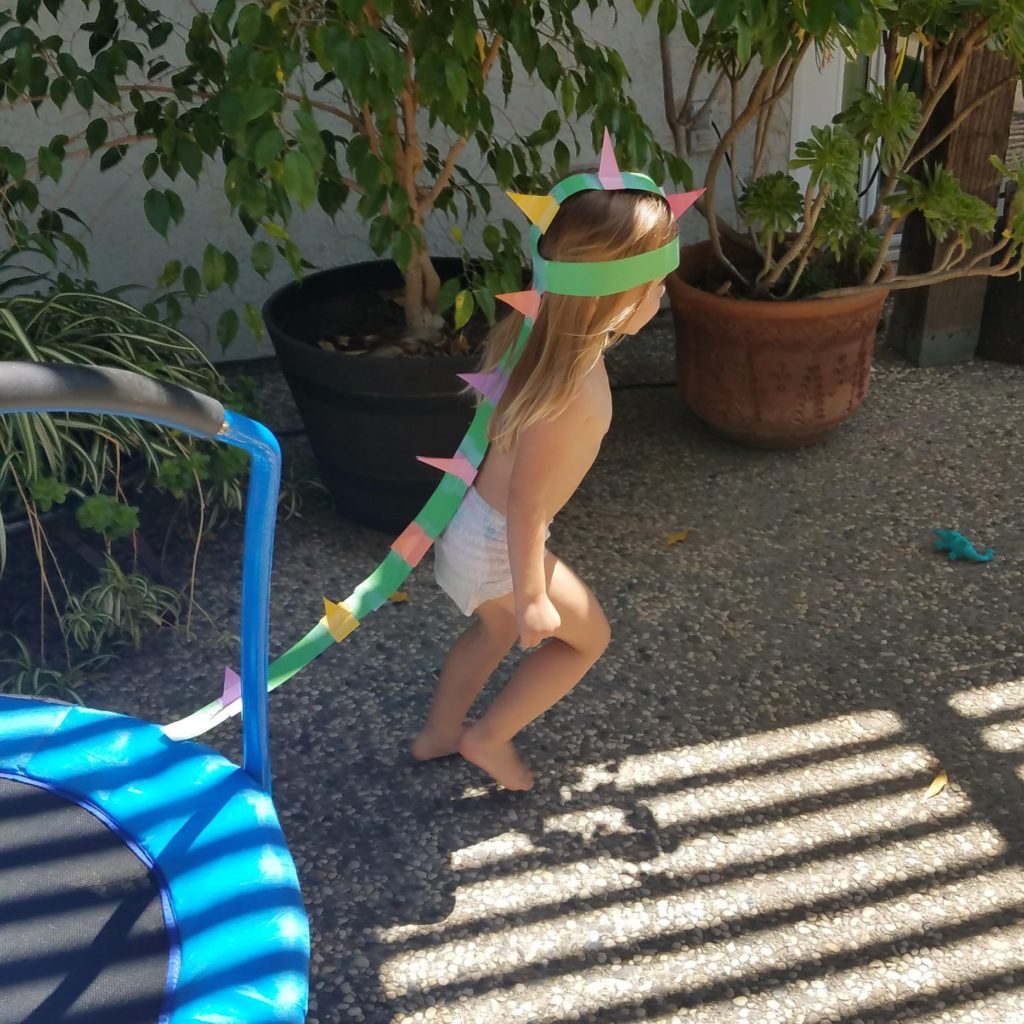
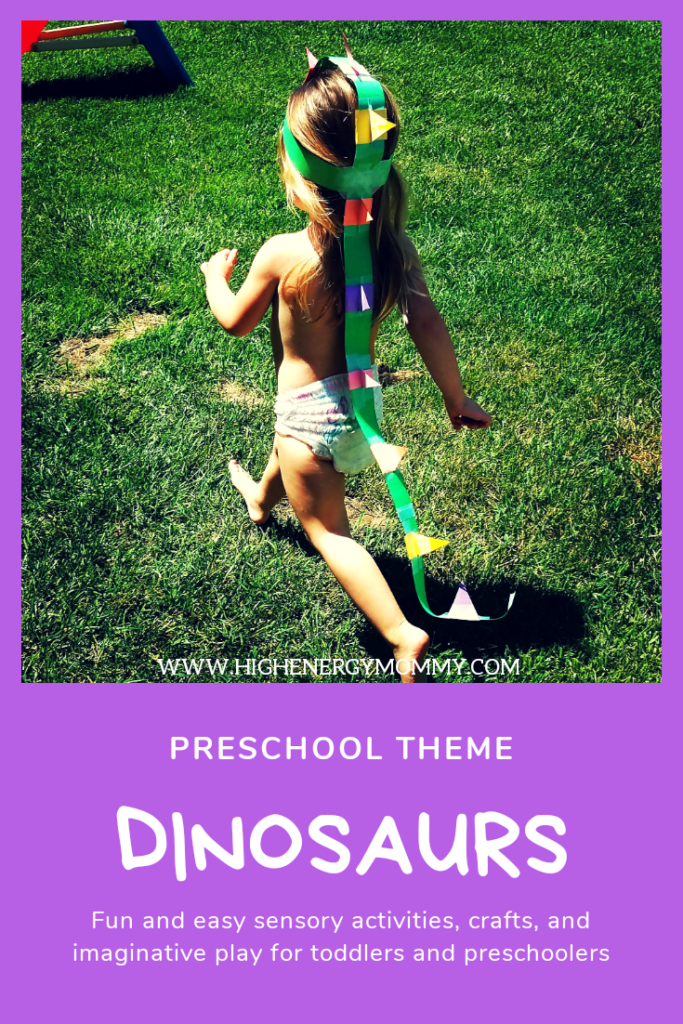
Make A Dinosaur Spike Headband and Tail

This was by far the most fun (and funniest) 5 minutes of the week! Emily loves putting things on her head so each week I’ve tried to incorporate some sort of costume or craft she can dress up in.
The only supplies you need are:
- scissors
- construction paper (in green and multiple other colors)
- tape
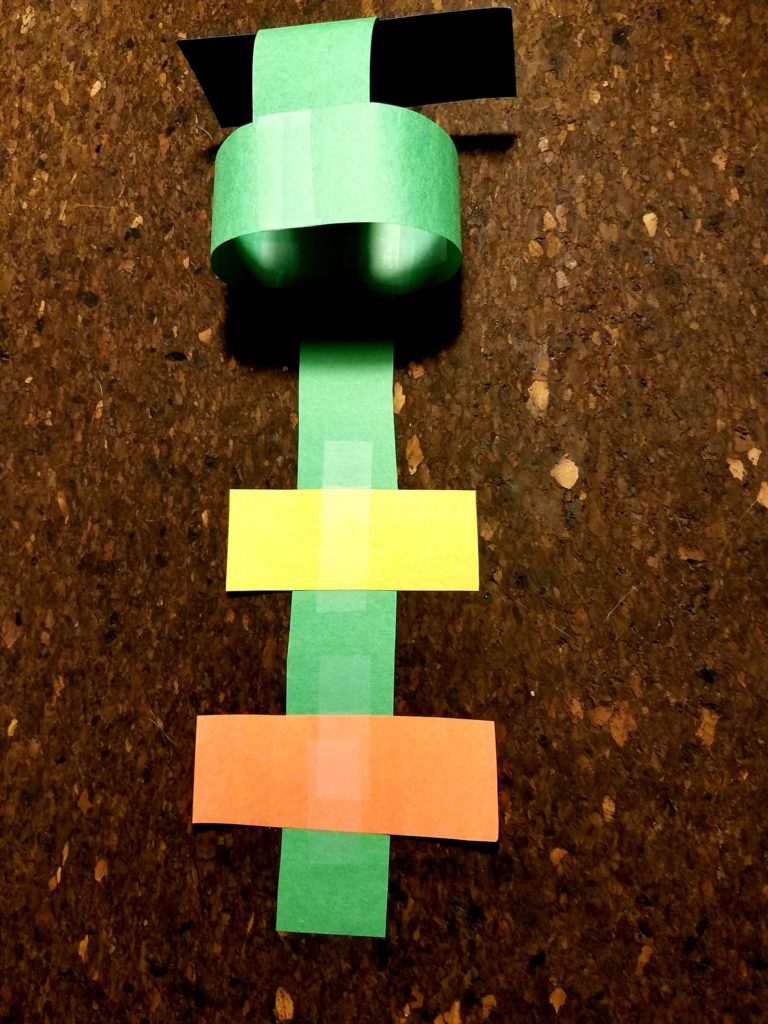
First, roughly measure the circumference of your child’s head and cut a strip of green paper that length, and about 1 1/2 inches wide, and tape the ends together to make what will look like a crown.
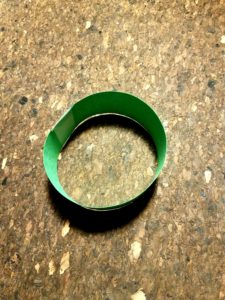
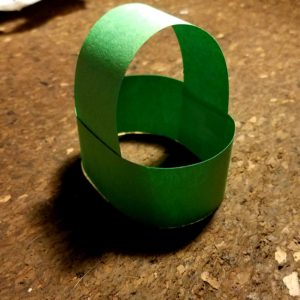
Also, roughly measure across the top of your child’s head (from forehead to back of the head) and cut another strip of paper, the same width (1 1/2 inches), and attach each end of that to the crown piece, this will make an arch shape that will go up over their head length wise.
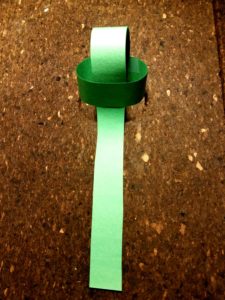
Next, cut a few long strips of green paper, also 1 1/2 inches wide, tape the ends together to make a long “tail”, and then attach one of the ends to the underside of the headband with more tape.
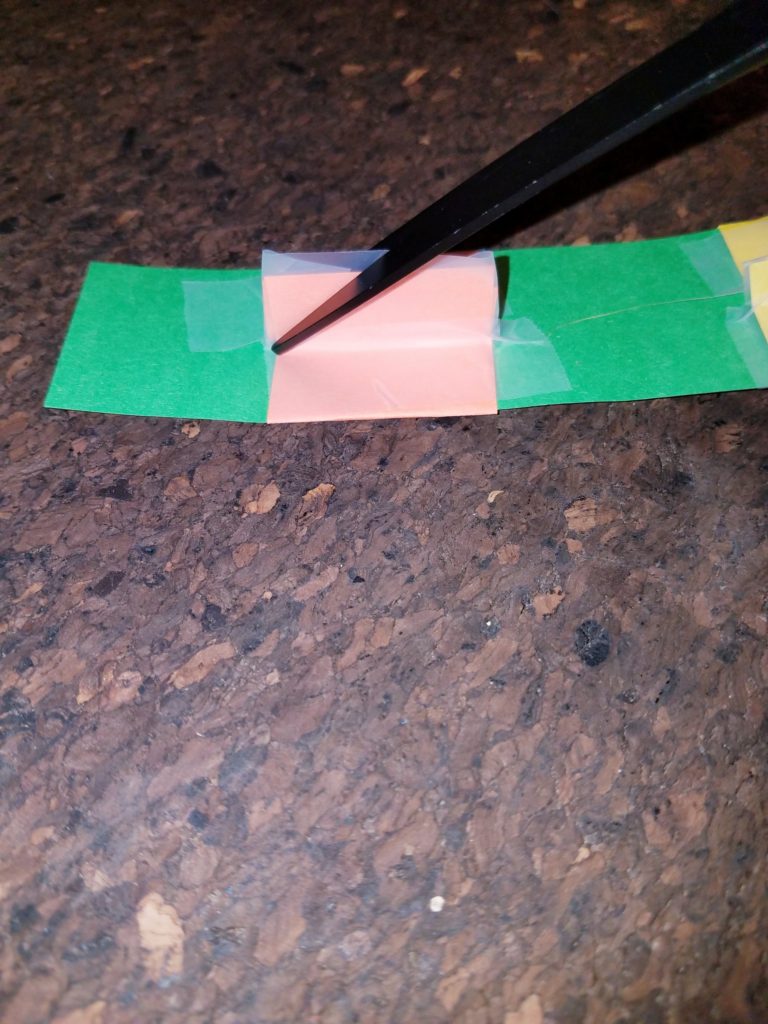
Then, cut some rectangles from multiple colors of paper about 6-8 inch long (and also about 1 1/2 inch wide), and tape them to the underside of the arched part of the headband, and all down the tail, a few inches apart in spacing. Make sure there’s an even amount of color showing on each side.
Fun Note: the longer the rectangle strips are the taller the “spikes” will be in the end.
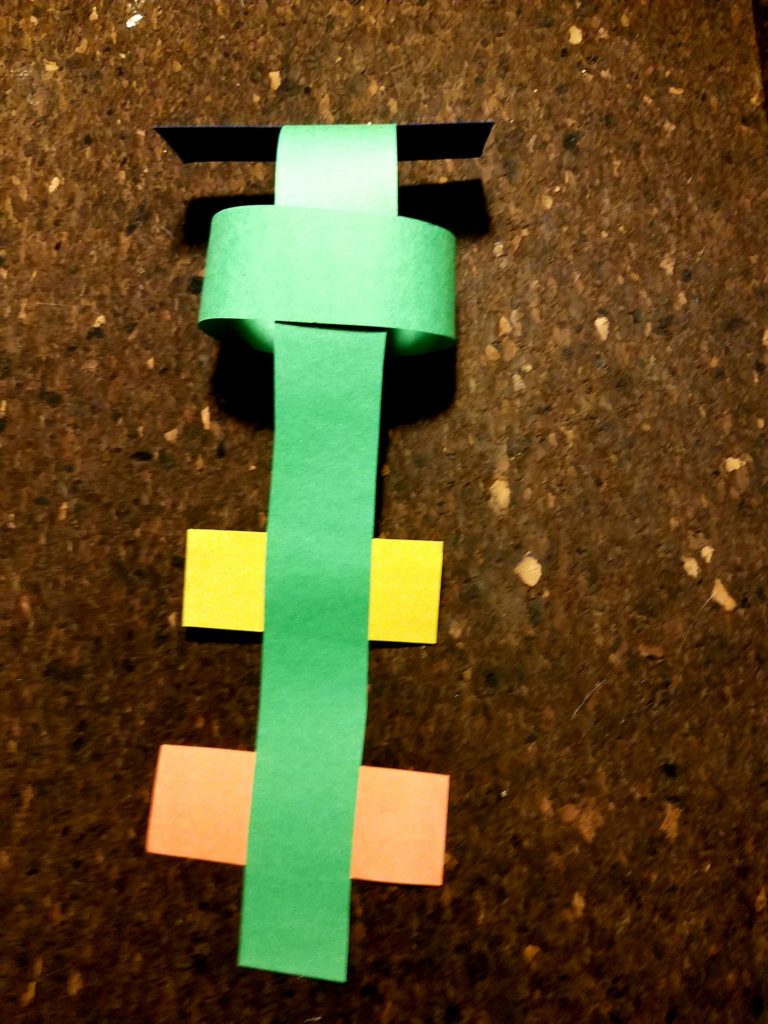
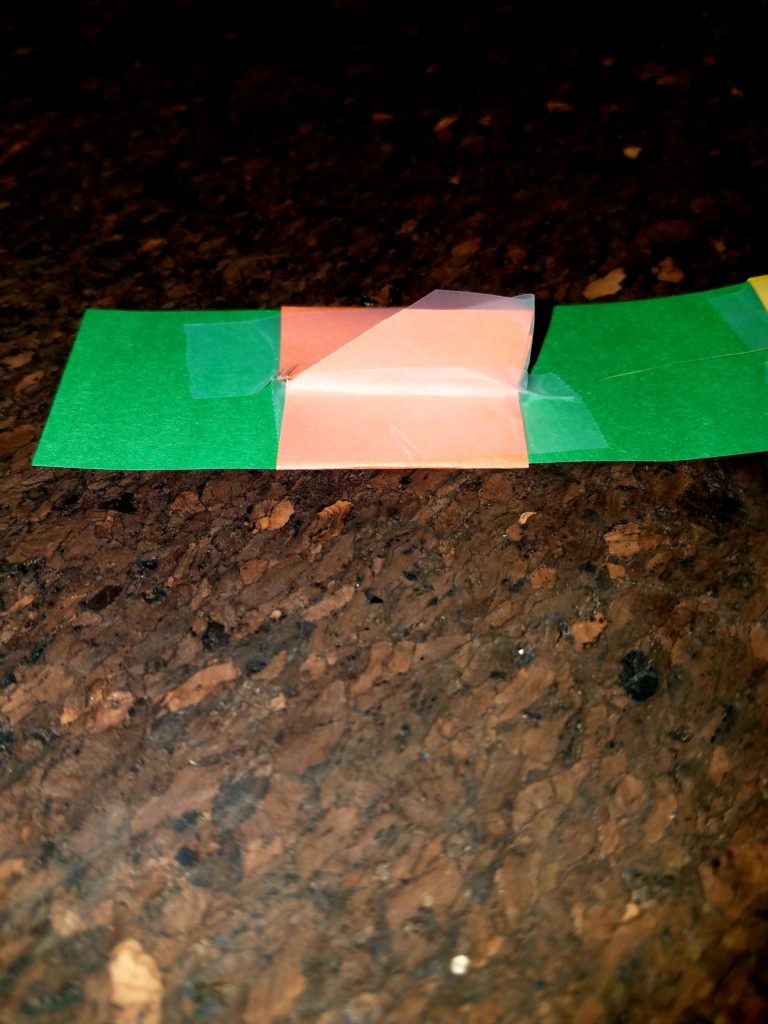
Pull the sides of the rectangles up over the green strip and tape them together at the ends, along the sides, and also at the base. Repeat this step for each colored piece along the arch and down tail. At this point they should look like little rectangular flags sticking straight up (kind of like tabs on a hanging file folder).
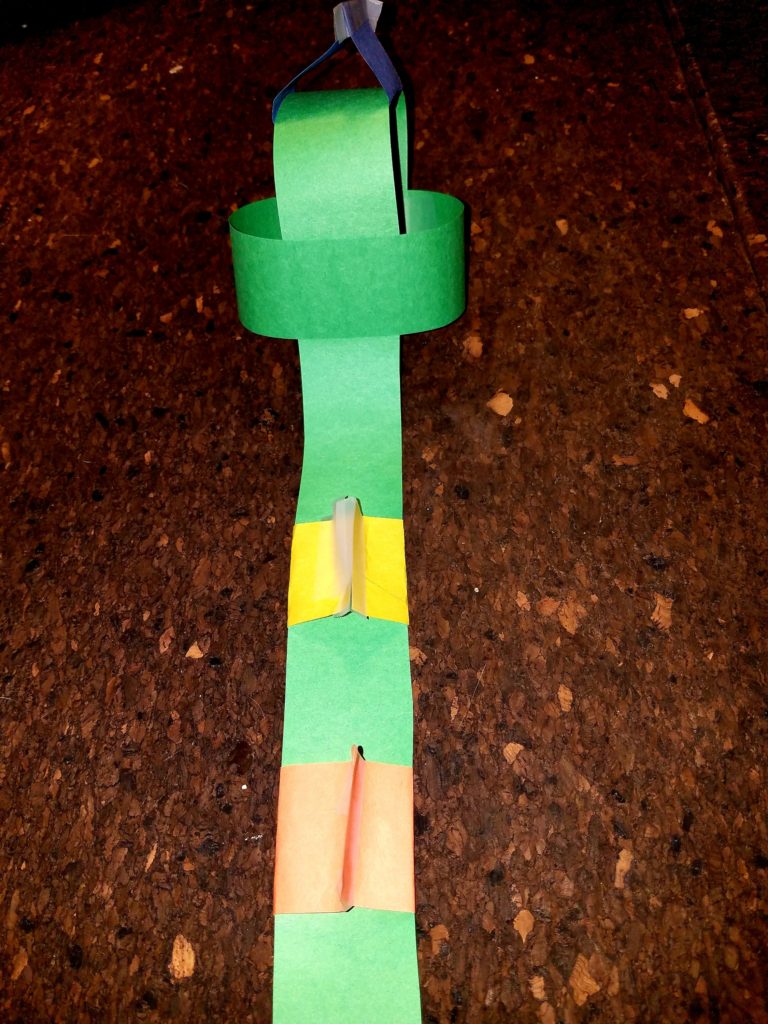
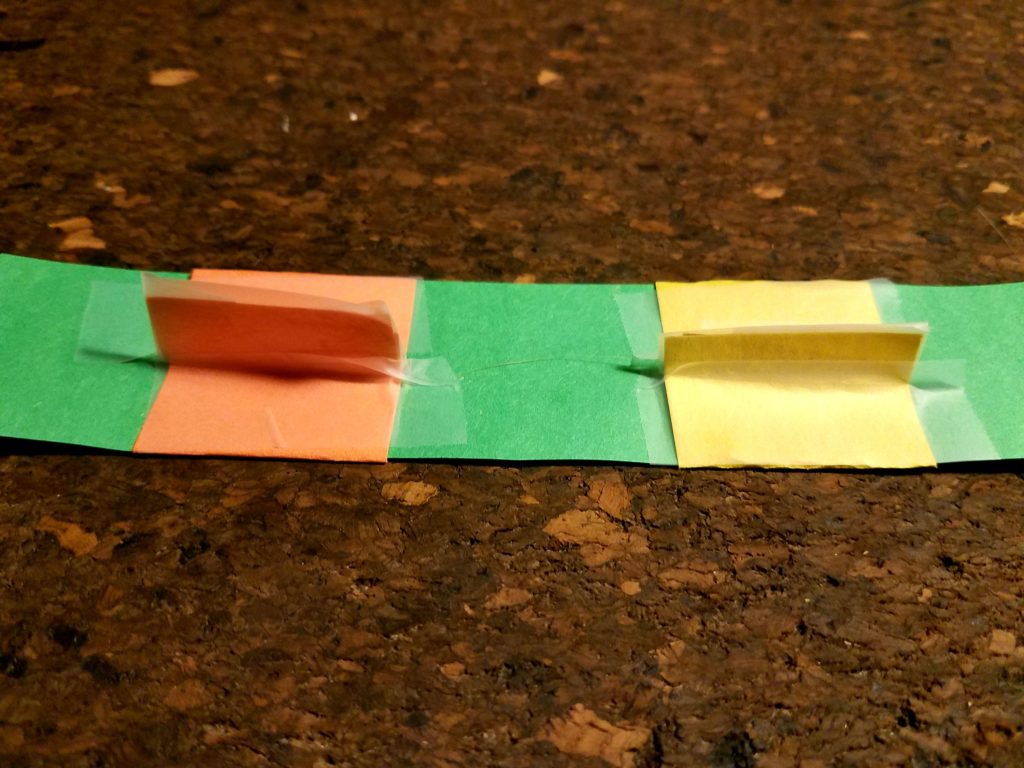
Lastly, cut each of the rectangle flags into a triangle by starting at the top and cutting down each side, on a diagonal, to its base. The paper at the point of the triangle might separate a little bit so you can reinforce it with more tape if you want.
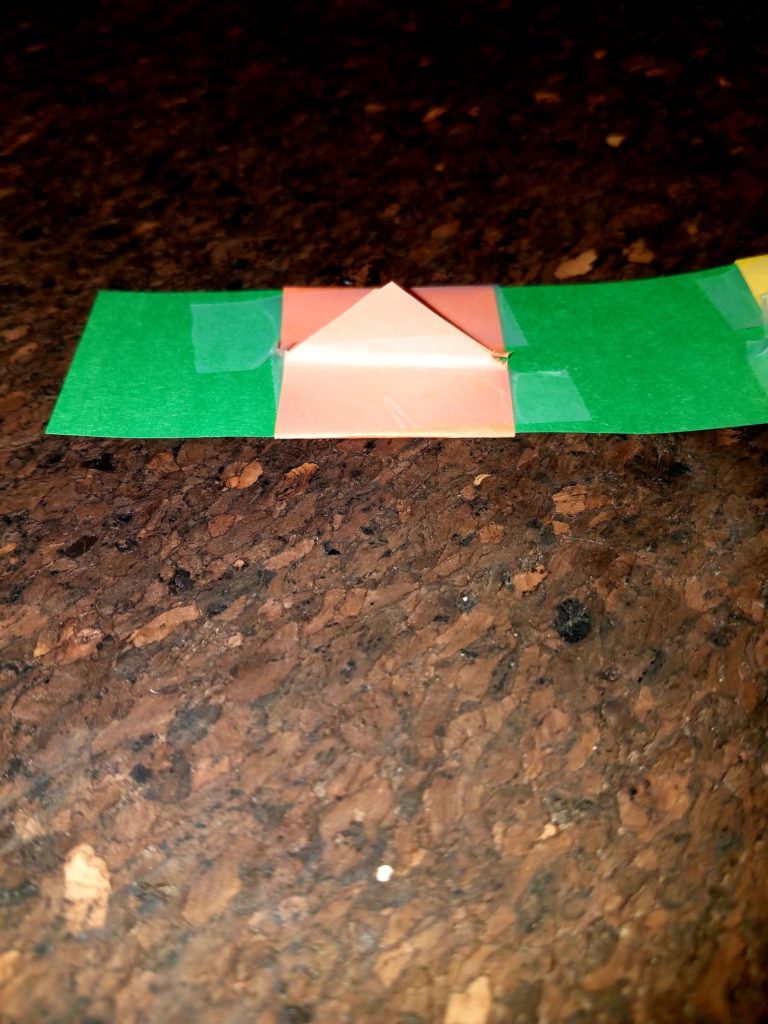
And that’s it! Now your little dino is ready to ROAR (literally in Emily’s case)! She took off running full speed, with the tail flying behind her, from our dining room out the back door and all around the yard, roaring the whole time.
And that’s a wrap on our Dinosaur activities week. I highly recommend having one sometime (or at least just making the headband and tail!).